
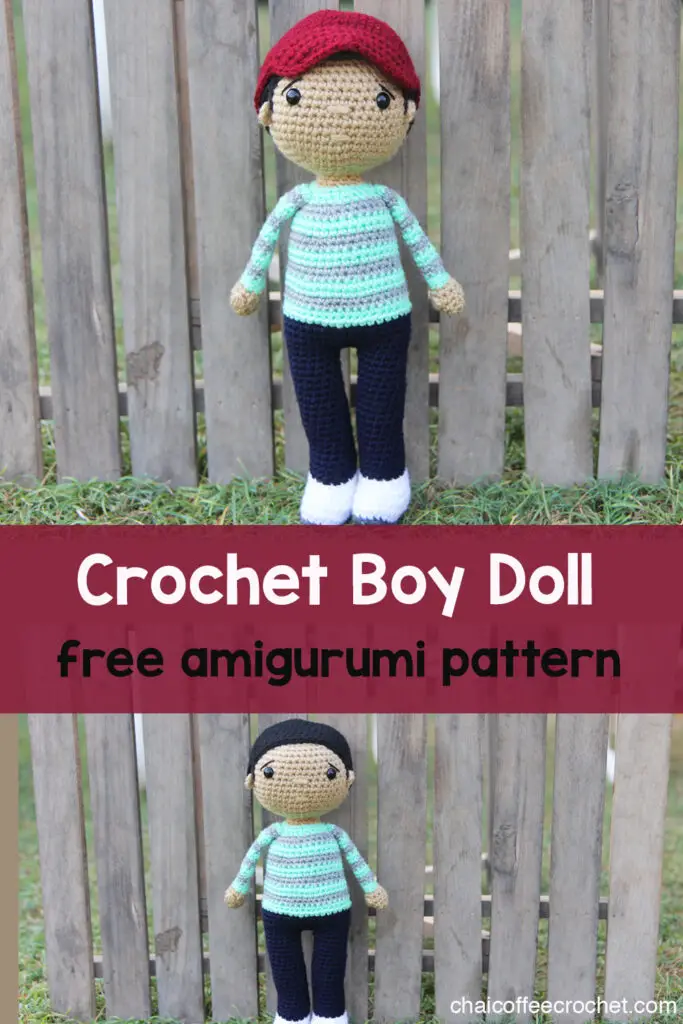
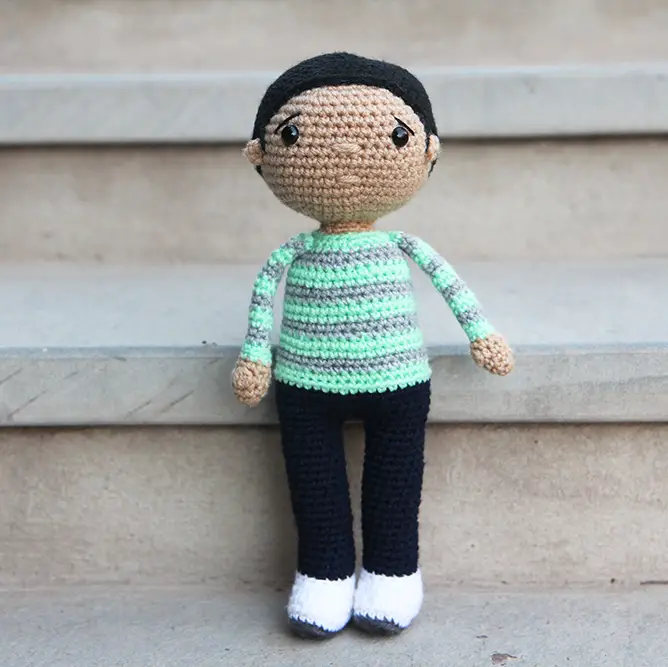
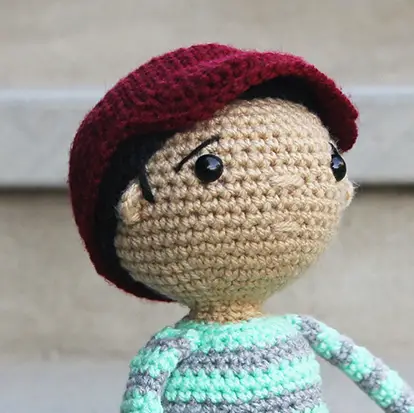
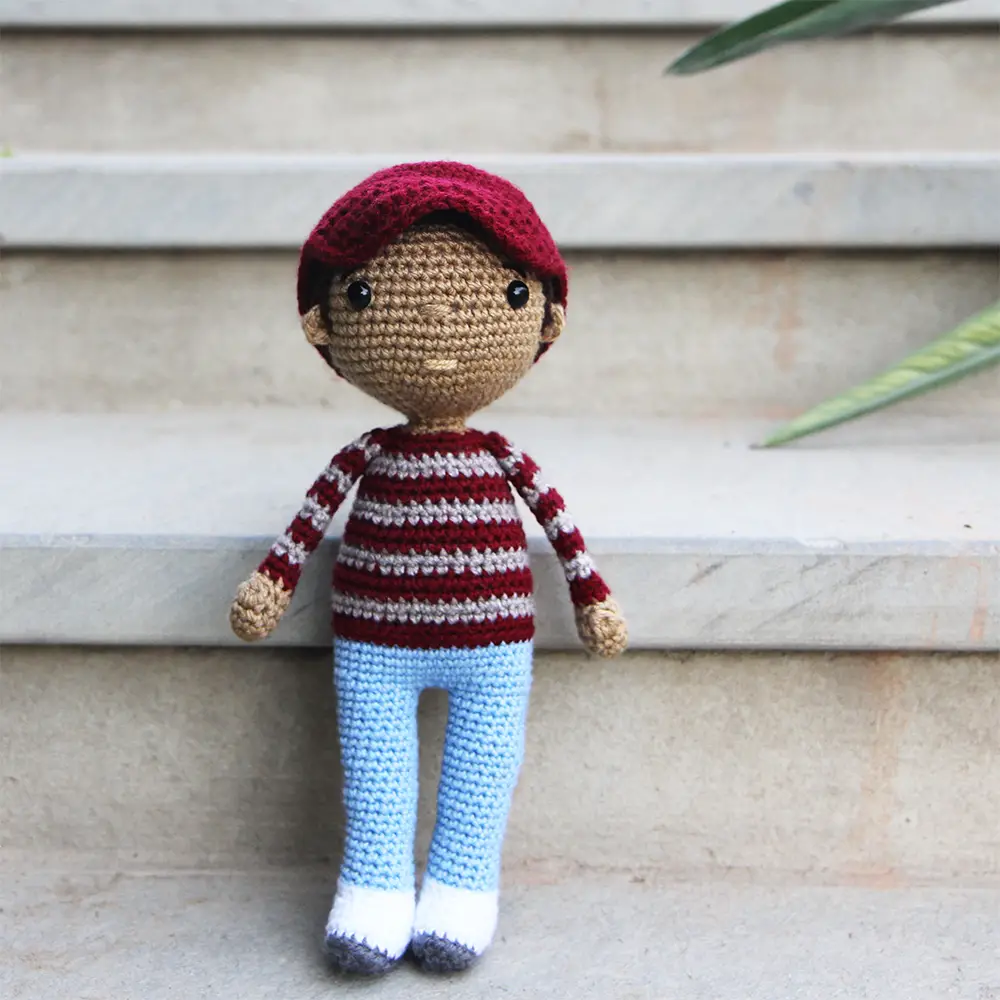
We’re so excited to share Zayd, our crochet boy doll free pattern with you! Zayd is part of the Zayd and Zoya series of crochet dolls. With his baseball cap and cute little ears, Zayd is just too sweet! Three years ago, when I was still new to amigurumi, I wanted to make a boy amigurumi doll for my nephew but there were such few patterns for boy dolls – it was a struggle to figure out a look that I was satisfied with.
So when we started this blog, we decided we wanted to design a free pattern for a crochet boy doll. Doll play is so important for children as a way to learn empathy, foster their imaginations, practice self-expression, and nurture emotional intelligence. Yet, boys are often left out of this equation. Zayd would make a wonderful crochet gift for the little boy (or girl) in your life.
About this male crochet doll pattern
This cute crochet boy doll pattern is crocheted in a spiral round. Be sure to use a stitch marker at the start of each round to ensure that you know where the beginning and end of each round is.
Since the shirt has stripes, for a neater look, ensure that you begin each round of the boy doll’s sweater at the center back of your doll. Crochet stitches in spiral rounds can tend to lean, so you may have to do a few extra single crochet stitches at the end of the round to get to the center. These stitches will not count as part of the pattern. Start each colour change round with a slip stitch to minimize the jog when you change colours.
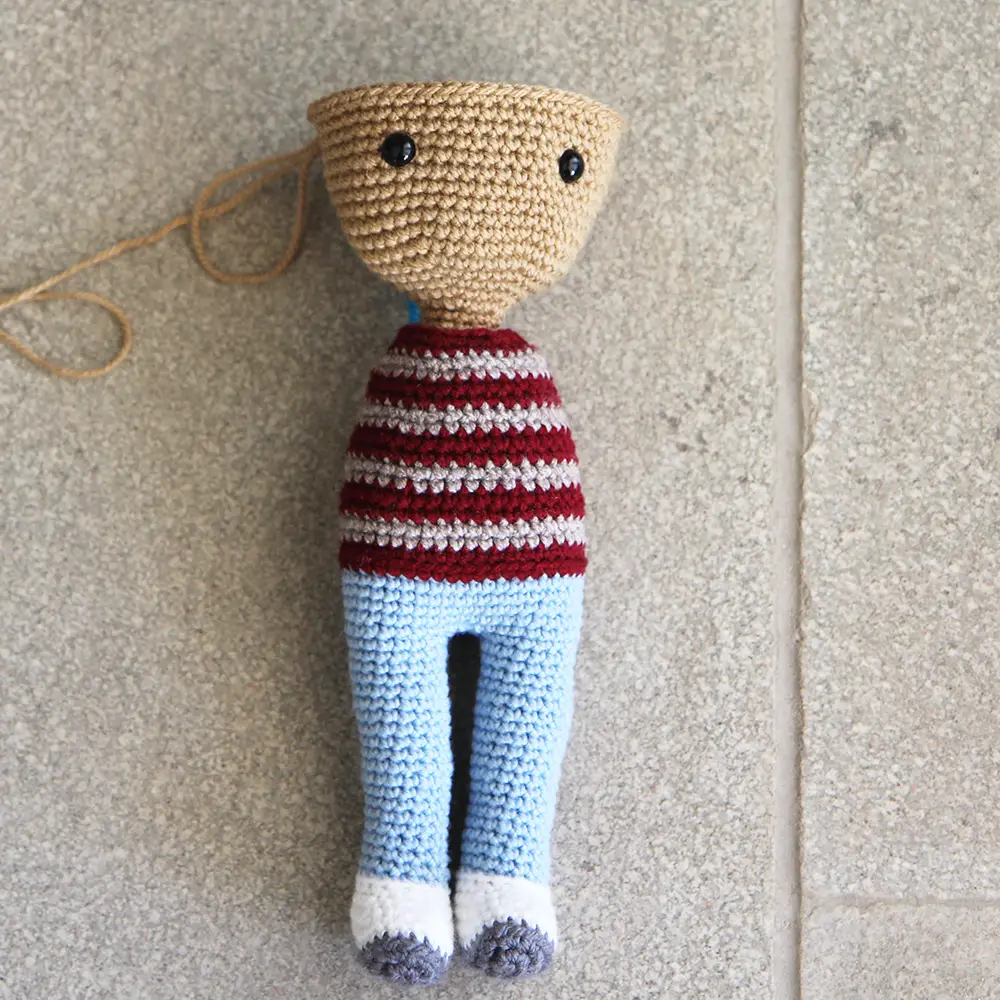
You sweet little boy doll should be approximately 12 inches in height using DK yarn and a 2.75mm crochet hook – making it an adorable huggable companion. It is worked mostly in one piece – you just have to sew on the hair cap! He comes with a really cute removable baseball cap too. The head size is the same as all the other dolls in our Zoya & Zayd series of crochet dolls and so you can exchange the haircap with any of the haircaps in the series. Moreover, Zayd’s baseball cap will fit all the other dolls in the series.
This crochet boy doll pattern is easy and is suitable for experienced beginners.
If you would like an ads-free, print-friendly PDF version of our pattern, you can buy it from our Ravelry store.
Want to save this pattern for later? Save this pin to your Pinterest board.
Crochet Boy Doll Free Pattern
This pattern is for your personal use only and cannot be sold, copied, or reproduced in any way without permission from the designers. You may sell finished objects made from this pattern in small quantities but please give credit to chaicoffeecrochet.com as the pattern designer.
Tools & Supplies You Will Need to Crochet a Boy Doll
- Yarn: Less than 50 grams of DK yarn in the pant colour, hat colour, hair colour, and skin colour. A small amount of yarn in the shirt colour, stripe colour, shoe colour, and the soles of the shoes colour.
- 2.75mm crochet hook
- Tapestry needle
- Stitch marker
- Polyfill stuffing
- Two 10mm safety eyes or you can crochet the eyes
Amigurumi Boy Doll: Stitches & Abbreviations Used
This pattern is written in US terms and crocheted in continuous rounds, except where specified otherwise.
Sl st: slip stitch
SC: single crochet
INV DEC: invisible decrease
DEC: decrease
INC: two SC in the same stitch
BLO: back loops only
HDC: Half double crochet
HDC INC: two HDC in the same stitch
DC: Double crochet
4 DC Bobble: See special stitches
Special Stitches
4 DC Bobble
We will be using this stitch to make the thumb on your doll’s hand.
- Yarn over. Insert hook into the next stitch. Pull up a loop. Yarn over and pull through two loops. (2 loops on your hook)
- Yarn over. Insert hook into the same stitch. Pull up a loop. Yarn over and pull through two loops. (3 loops on your hook)
- Yarn over. Insert hook into the same stitch. Pull up a loop. Yarn over and pull through two loops. (4 loops on your hook)
- Yarn over. Insert hook into the same stitch. Pull up a loop. Yarn over and pull through two loops. (5 loops on your hook)
- Then yarn over and pull through all five loops.
Finished size: Approximately 12 inches tall
How to Crochet the Boy Doll
Arms (make 2)

Begin with skin colour yarn. Stuff the arms lightly at the bottom and leave the rest of the arm unstuffed.
Round 1: 6 SC in a magic circle (6)
Round 2: (SC, INC) three times (9)
Round 3: SC around (9)
Round 4: 4 SC, 4 DC Bobble, 4 SC (9)
Round 5: 7 SC, INV DEC (8)
Change to shirt colour
Round 6: SC around (8)
Round 7: SC around in BLO (8)
Change to stripe colour
Round 8-9 (2 rounds): SC around (8)
Change to shirt colour
Round 10-11 (2 rounds): SC around (8)
Change to stripe colour
Round 12-13 (2 rounds): SC around (8)
Change to shirt colour
Round 14-15 (2 rounds): SC around (8)
Change to stripe colour
Round 16-17 (2 rounds): SC around (8)
Change to shirt colour
Round 18-19 (2 rounds): SC around (8)
Change to stripe colour
Round 20-21 (2 rounds): SC around (8)
Change to shirt colour
Round 22: SC around (8)
Tip: If you want to crochet the arms on your doll instead of sewing them on, continue SC until you reach the side of the arm of your doll. Now pinch the two ends of the arm together, chain one, and single crochet through both sides to close the arm. Weave in the ends. See our tutorial on crocheting arms to your amigurumi to see how to finish off the arms.
If you prefer to crochet in the arms, fasten off and leave a long tail for sewing.
Legs (make 2)
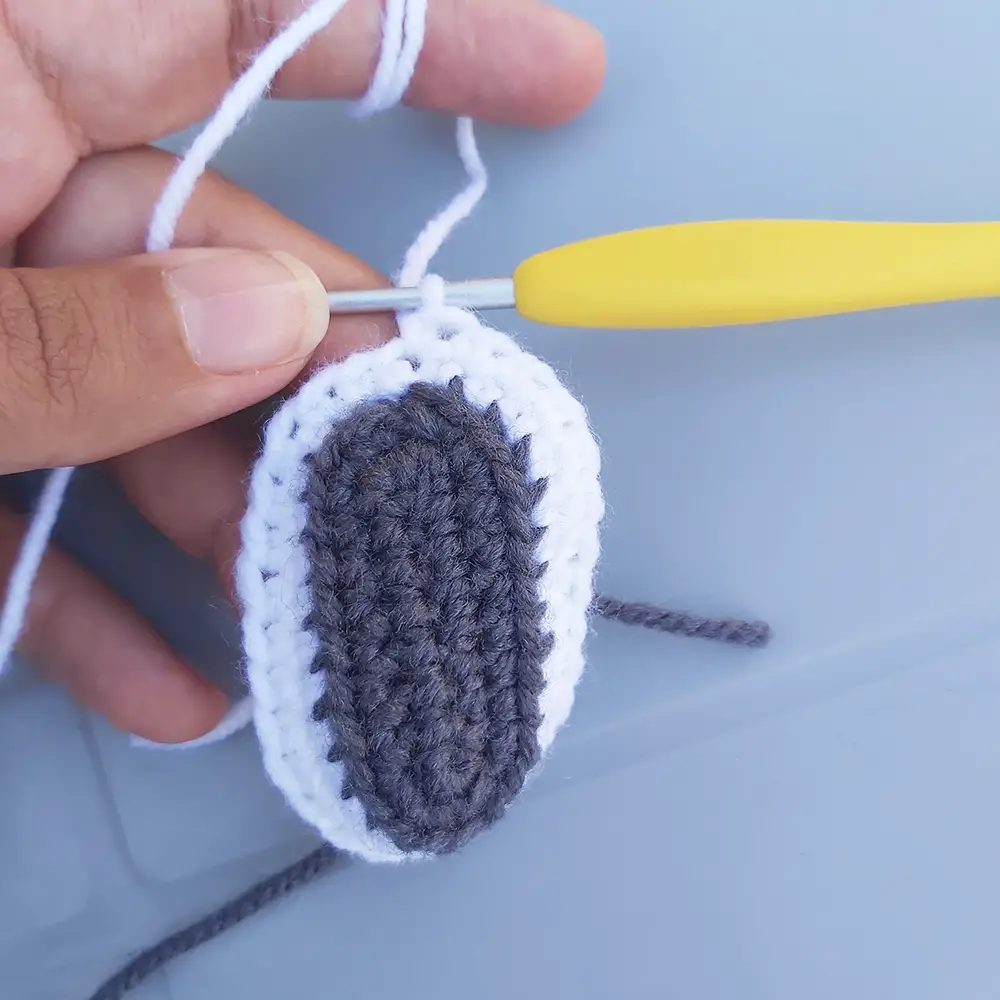
Tip: The base shape of the shoe is an oval, so we will be crocheting around chain, rather than a magic circle as we usually do with amigurumi. If you are new to crocheting around a chain, we have a tutorial on how to crochet an oval for amigurumi.
Begin with the colour for the soles of the shoes.
Stuff as you go.
Round 1: Chain 9. Starting in the second chain from the hook, INC, 6 SC, 4 SC in the next chain as your work turns. Now continue on the other side of the chain. 6 SC and INC in the last chain (20)
Round 2: (INC) in each of the first two stiches, 6 SC, (INC) in each of the next 4 stitches, 6 SC, (INC) in each of the next two stitches (28)
Change to the shoe colour
Round 3: SC around in BLO (28)
Round 4: SC around (28)
At this stage you want to be at the center of the shoe so that the decreases are evenly spaced. You may need to do one more SC or so to get to the center (the placement of where you end up could vary based on your yarn and tension) and then mark that as the end of Round 4.
Round 5: 8 SC, INV DEC, 2 SC, (INV DEC) twice, 2 SC, INV DEC, 8 SC (24)
Round 6: 7 SC, INV DEC, SC, (INV DEC) twice, SC, INV DEC, 7 SC (20)
Round 7: 6 SC, (INV DEC) four times, 6 SC (16)
Change to pant colour
Round 8: SC around in BLO (16)
Round 9-26 (18 rounds): SC around (16)
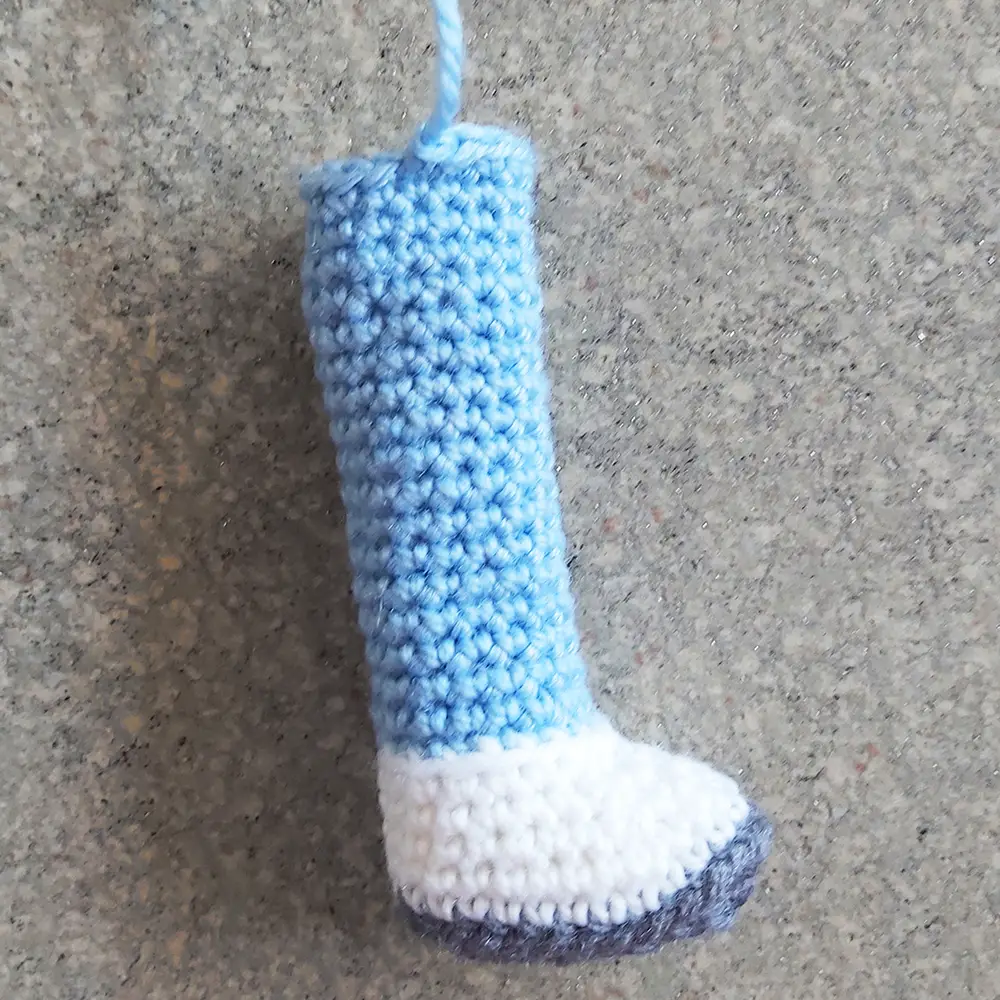
You should be on the left side of the leg in the middle, like in this photo. You want to be on the left side of the leg so that your colour changes for the shirt stay at the back of your doll when you join the legs. If you’re not there (since this may vary based on the yarn you use and your tension), do any additional stitches you need to get there.
Fasten off for the first leg.
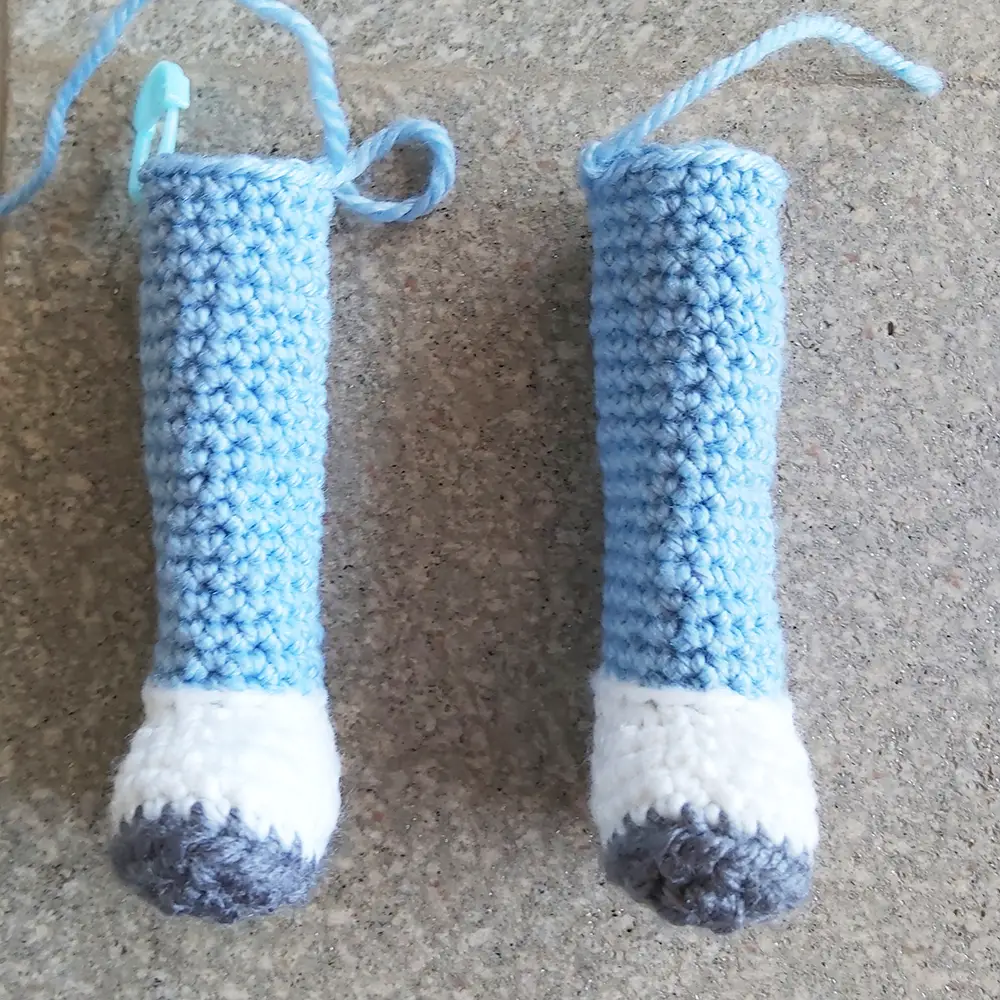
Repeat rounds 1-26 for the second leg. However, in Round 26 continue for 8 more stitches, until you end up on the right side of the leg at the center, opposite of where you ended up on the first leg. This way, when you join the legs, both legs will be facing forward.
Do not fasten off for the second leg.
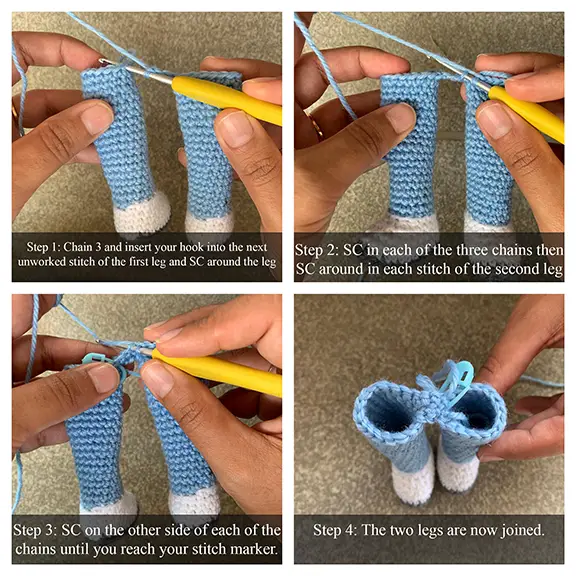
Body
Round 27: Chain 3 and SC in the next unworked stitch of the first leg. Place a stitch marker in this stitch to mark the start of your round. SC in the remaining 15 stitches of the first leg until you reach the chain, SC in each of the 3 chains, SC in the 16 stitches of the next leg, and SC on the other side of each of the three chains until you reach your stitch marker. (38)
Round 28: (8 SC, INC) four times, 2 SC (42)
Round 29-32 (4 rounds): SC around (42)
Change to shirt colour
Round 33: SC around (42)
Round 34: SC in each stitch in BLO (42)
Change to stripe colour
Round 35-36 (2 rounds): SC around (42)
Change to shirt colour
Round 37-38 (2 rounds): SC around (42)
Change to stripe colour
Round 39: (5 SC, INVDEC) six times (36)
Round 40: SC around (36)
Change to shirt colour
Round 41-42 (2 rounds): SC around (36)
Change to stripe colour
Round 43: SC around (36)
Round 44: (10 SC, INVDEC) three times (33)
Change to shirt colour
Round 45-46 (2 rounds): SC around (33)
Change to stripe colour
Round 47: SC around (33)
Round 48: (9 SC, INV DEC) three times (30)
Change to shirt colour
Round 49: SC around (30)
Round 50: (3 SC, INV DEC) six times (24)
Note: If you want to crochet your arms in, crochet them on during Round 50, on each side of the body. Make sure that the thumbs are pointing forward. To attach the arms, crochet through both the body and the arm. See our tutorial on how to crochet the arms onto the body.
Change to skin colour.
Round 51: (2 SC, INV DEC) six times in BLO (18)
Round 52: (SC, INV DEC) six times (12)
We will now continue onto the head. Do not fasten off.
Head
Round 53: SC around (12)
Round 54: (SC, INC) six times (18)
Round 55: (2 SC, INC) six times (24)
Round 56: (3 SC, INC) six times (30)
Round 57: (4 SC, INC) six times (36)
Round 58: (5 SC, INC) six times (42)
Round 59: (6 SC, INC) six times (48)
Round 60-69 (10 rounds): SC around (48)
Insert safety eyes between Rounds 65 and 66, eight stitches apart. Embroider on eyebrows. Ensure that the neck has been firmly stuffed so that you don’t end up with a wobbly head.
Tip: To keep the neck firm, you can crochet a tube of 8 SC and about 3 inches tall. Insert it and stuff firmly to support the neck. After you’re done with the head, use the leftover yarn tail, after making the nose, to put in a couple stitches into the neck, through this tube, to ensure that it stays in place. You could also use a foam roller instead.
Round 70: (6 SC, INVDEC) six times (42)
Round 71: (5 SC, INVDEC) six times (36)
Round 72: (4 SC, INVDEC) six times (30)
Round 73: (3 SC, INVDEC) six times (24)
Round 74: (2 SC, INVDEC) six times (18)
Ensure that the head is well stuffed.
Round 75: (SC, INVDEC) six times (12)
Round 76: INVDEC six times (6)
Fasten off and leave a long tail to embroider on the nose. Insert needle in front loop of each stitch and pull tight to close. Use the yarn tail to embroider on the nose by making two to three passes over three stitches, one row below the eyes. Embroider on the mouth three rows below the nose.
If you haven’t attached the arms yet, sew them closed and sew them on between rounds 49 and 50, matching the stripes on the sleeves with those on the shirt. The thumbs (made from the bobble stitch) should face forward.
Crochet Boy Doll Hair Cap
Use hair colour yarn
Round 1: 6 SC in a magic circle (6)
Round 2: INC in each stitch around (12)
Round 3: (SC, INC) six times (18)
Round 4: (2 SC, INC) six times (24)
Round 5: (3 SC, INC) six times (30)
Round 6: (4 SC, INC) six times (36)
Round 7: (5 SC, INC) six times (42)
Round 8: (6 SC, INC) six times (48)
Round 9-16 (8 rounds): SC around (48)
Note: The hair cap width can vary based on the yarn that you’re using so try it onto your doll’s head and see if you want to increase or decrease rounds.
Fasten off and leave a long tail for sewing. Sew onto head and leave the tail for sewing on the sideburns after you attach the ears.
Ears (make 2)
Use skin colour yarn
4 SC in a magic circle. Fasten off and leave a long tail for sewing. Sew onto the head, one row below the eyes. Use the hair yarn to make two passes in front of the ear for sideburns.
How to Crochet a Baseball Cap
Using the cap colour
Round 1: 6 SC in a magic circle (6)
Round 2: INC in each stitch around (12)
Round 3: (SC, INC) six times (18)
Round 4: (2 SC, INC) six times (24)
Round 5: (3 SC, INC) six times (30)
Round 6: (4 SC, INC) six times (36)
Round 7: (5 SC, INC) six times (42)
Round 8: SC in each stitch around (42)
Round 9: (6 SC, INC) six times (48)
Round 10: (7 SC, INC) six times (54)
Round 11-14 (4 rounds): SC around (54)
Round 15: SC around and sl st to the first sc.
Round 16: 20 SC in FLO. Chain 1 and turn. (20)
We will now be working in rows to make the bill of the cap.
Row 17-18 (2 rounds): 20 SC. Chain 1 and turn.
Row 19: DEC, 16 SC, DEC. Chain 1. Turn. (18)
Row 20: DEC, 14 SC, DEC. Chain 1. Turn. (16)
Row 21: DEC, 5 SC, DEC, 5 SC, DEC. (13)
Round 22: Do not turn. SC evenly around the entire hat, including the bill. Sl st to the first stitch of the round.
Fasten off and leave a long tail for sewing, if you would like to sew the hat on your doll. If you would prefer to leave the hat removable, weave in the ends.
Your Zayd crochet boy doll is now complete! We hope you enjoyed this free amigurumi boy doll pattern! We would love to see your finished dolls, so share them on our Facebook group Amigurumi with Chai Coffee Crochet or tag us on Instagram @chaicoffeecrochet We like to share a selection of makes from our patterns in our stories and highlights.
How do you crochet a small boy doll?
If you prefer to crochet a small boy doll, you can check out our small crochet boy doll Faiz, from our Kozu Palm Pals series of small crochet dolls. He is just approximately 4 inches tall.
If you would like to crochet our Zayd doll in a small size, you could always use a thinner yarn with the relevant hook and the doll would come out smaller.
How long does it take to crochet a boy doll?
The exact time it will take you to crochet this boy doll will vary based on your speed, familiarity with crochet, and how much time you devote to it in a sitting. However, on average it should take approximately six hours of crochet time to make this boy doll.
What else can you crochet for boys?
The short answer is anything you can crochet for girls! However, as the aunt to three nephews (who were the inspiration behind this Zayd doll pattern), I have put together a round up of 15+ Crochet Patterns for Boys that they will love!