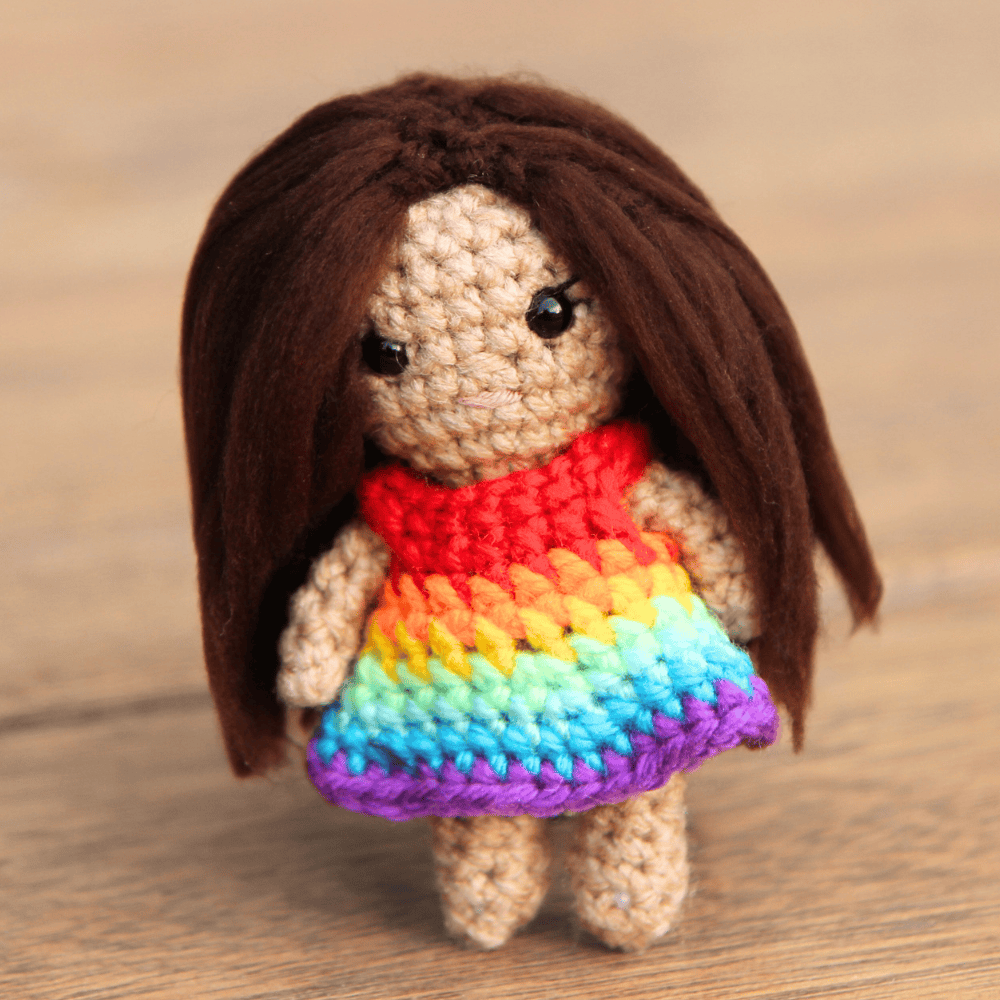
I love crocheted doll hair but sometimes you want the hair to look a little more realistic. Plus, as a kid I loved styling my doll’s hair and so I love hair that you can play with. So today we will show you a bit of yarn magic: how to brush yarn so that it turns fluffy and looks like real hair!
It’s actually really simple to do. But it takes a bit of time so you need patience. Let’s dive right in!
Want to save this for later? Save it to your Pinterest Board.
Tools and Supplies You Will Need to Brush Doll Hair
- A doll body (if you’re trying this for the first time, try one of our Kozu Palm Pals dolls – it’s super fast to make and there are multiple options to customize it!)
- Yarn in the hair colour: You will need yarn in the same weight as the yarn used to make the doll of the hair cap. However, when you make the strands, you can either use the same weight yarn for thicker yarn or a yarn weight lighter for thinner hair. Note: Any type of yarn will work, although they all will have different results. I use acryllic yarn.
- A pet slicker brush
How to Brush Crochet Doll Hair
1. Crochet a Hair Cap
As a first step, you should make the hair cap. If you’re using a Kozu Palm Pals crochet doll, use the below pattern. However, if you are using another doll, make a hair cap. The hair cap should be the same width as the head of the doll. So, for example, the Kozu Palm Pals’ dolls go up to 24 SC in the head, so the hair cap does the same. And then you just do a few more rounds of 24 so that it fits on the head and covers the hair.
Hair Cap Pattern for the Kozu Palm Pals
Using the hair colour yarn
Round 1: SC 6 into a magic ring.
Round 2: INC in each stitch around (12)
Round 3: (SC, INC) six times (18)
Round 4: (2 SC, INC) six times (24)
Round 5-9 (5 rounds): SC in each stitch around (24)
Note: The hair cap width can vary based on the yarn that you’re using so try it onto your doll’s head and see if you want to increase or decrease rounds here before fastening off.
Fasten off and leave a long tail for sewing. Sew the hair cap onto the hair.
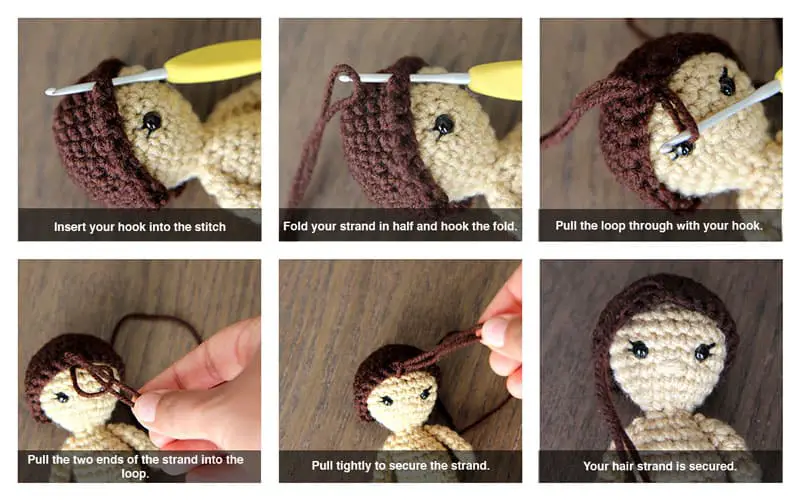
2. Latch Hair onto the Doll
Now latch hair onto the doll, one strand at a time. Cut the strands for the hair. Each strand should be double the length you want the hair to be, as the strands will be folded in two. Keep the strands a little longer than you think, as they can always be cut later. For the Kozu Palm Pals dolls, I cut the strands about 12 inches long.
You will need quite a few strands to cover the head! But don’t worry, you can always cut more later if you run out.
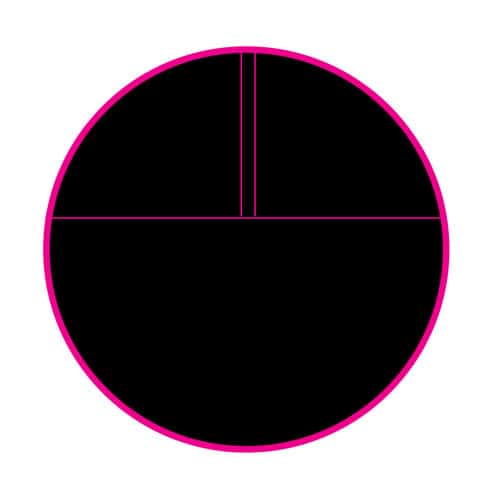
The strands should be latched onto the doll head around the periphery of the hair cap. Then latch the strands in the center of the head, approximately a third of the way down the front of the head. They should be latched on both sides to create a part. Then add another line of hair at the edge of the parting, cutting across the hair cap.
See the areas marked in pink in the diagram below (the top of the diagram is the front of the hair cap of your doll).
Then fill in strands of hair sporadically throughout the hair cap. Be sure to not fill it up too much, as the hair will become too thick. Alternatively, you don’t want it to be to sparse so that the hair cap shows.
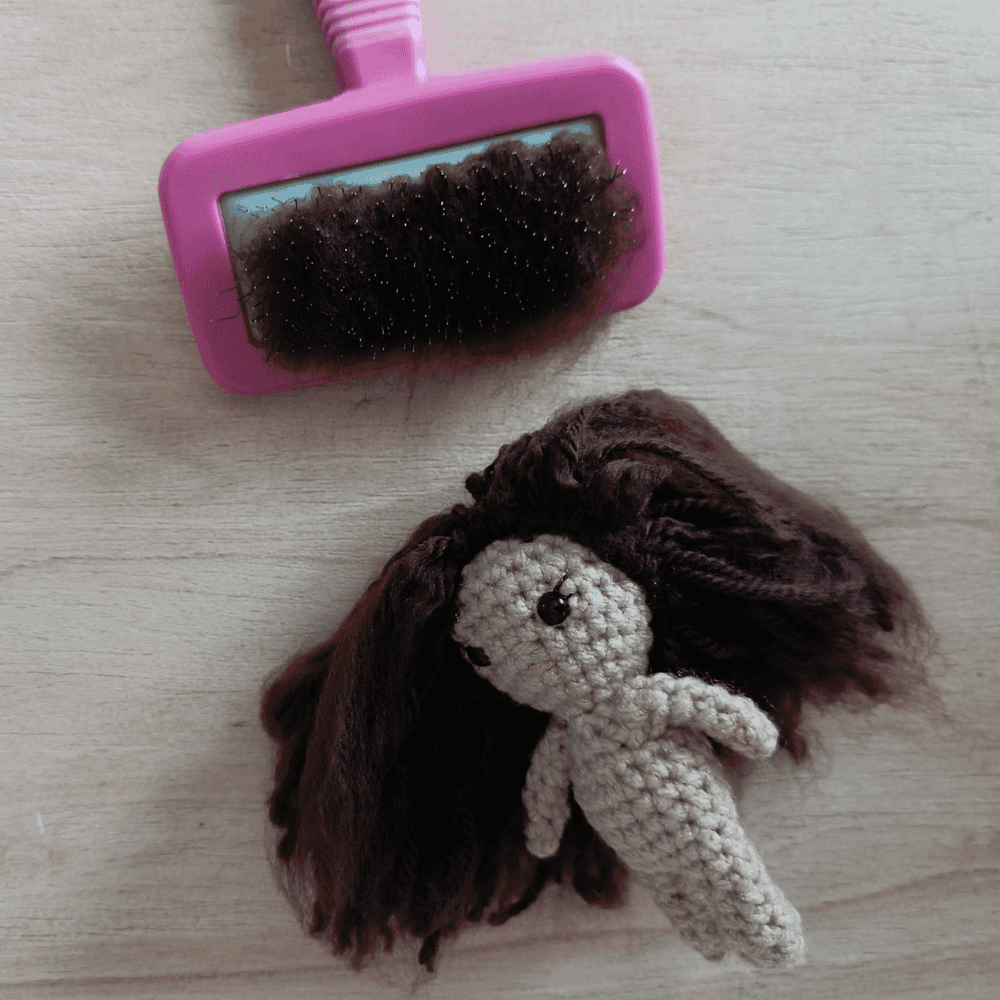
3. Brush the Hair on the Doll
Now it time to grab that pet slicker brush and brush your doll hair!
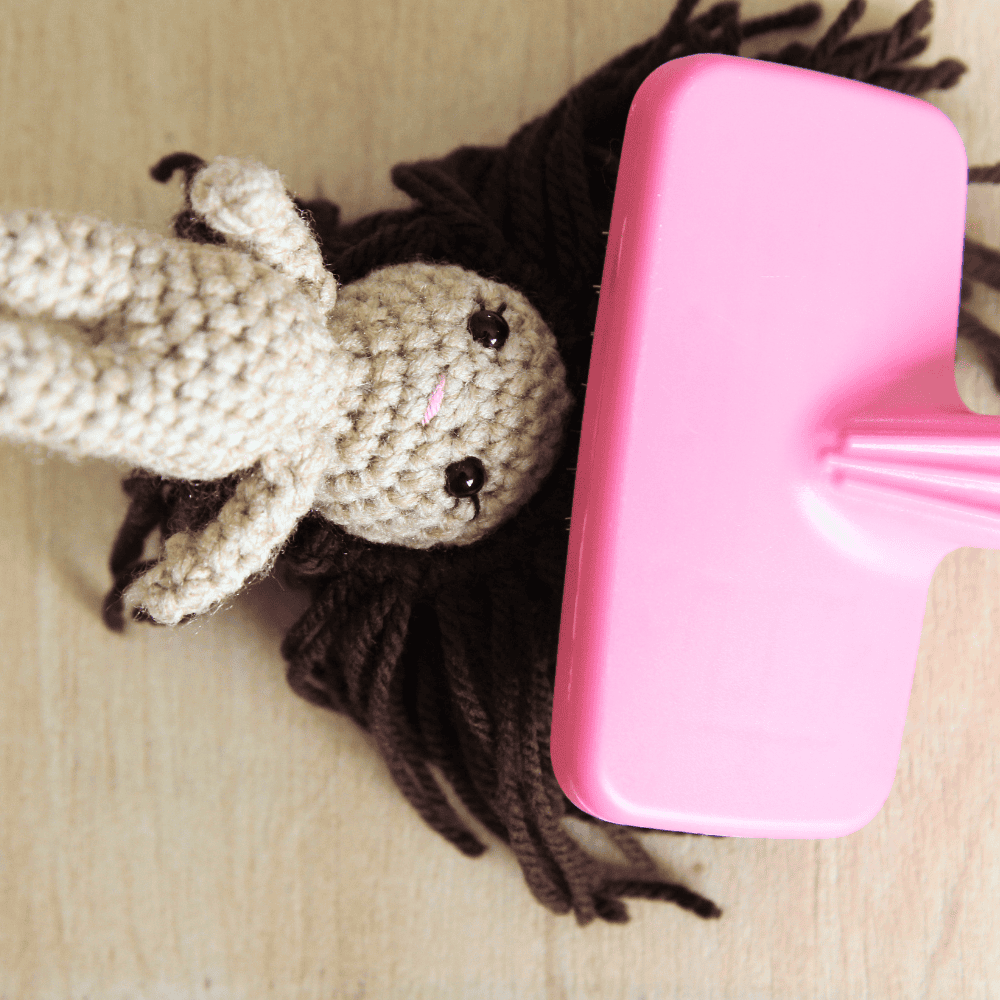
Be sure to brush in all directions.
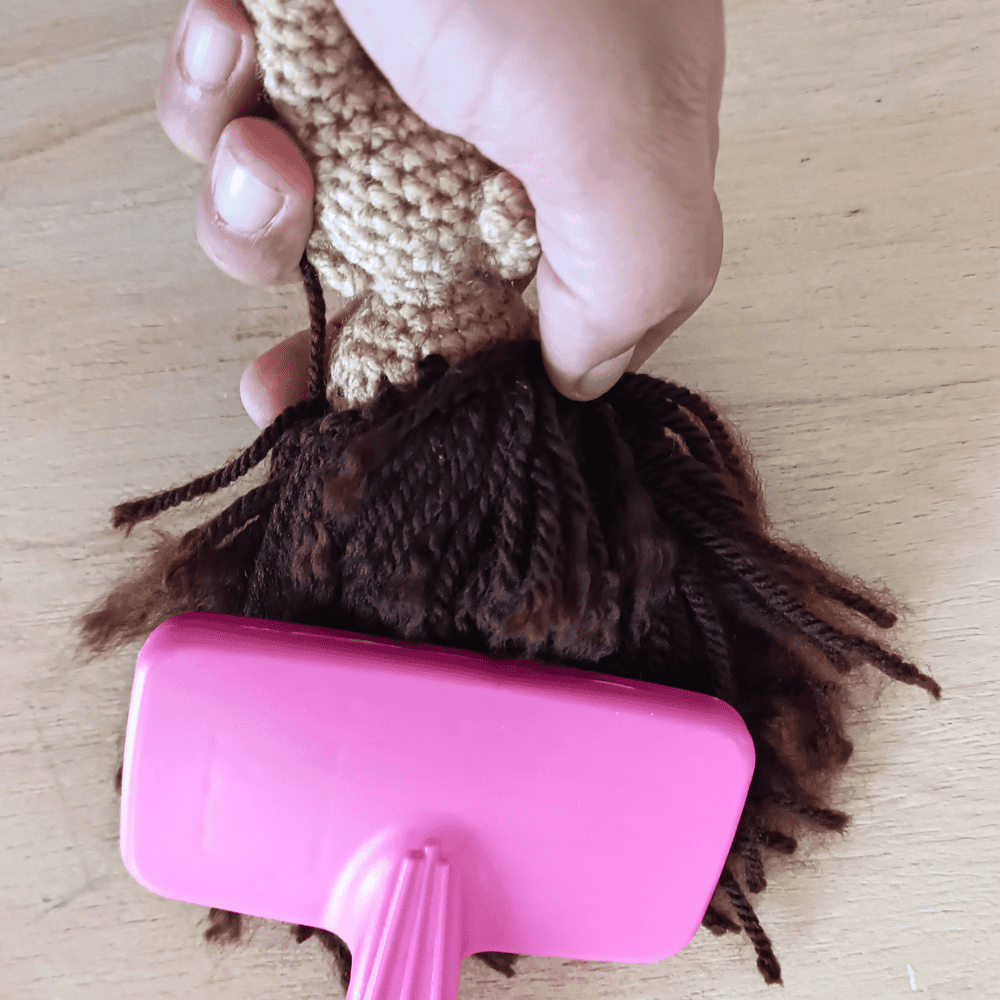
You will get a lot of yarn coming out on your brush (a lot!). Just remove it from the brush and keep brushing. You can save this and use it as stuffing or even as a substitute for roving for needle felting on your amigurumi (I’ve never done that but I hear it works!).
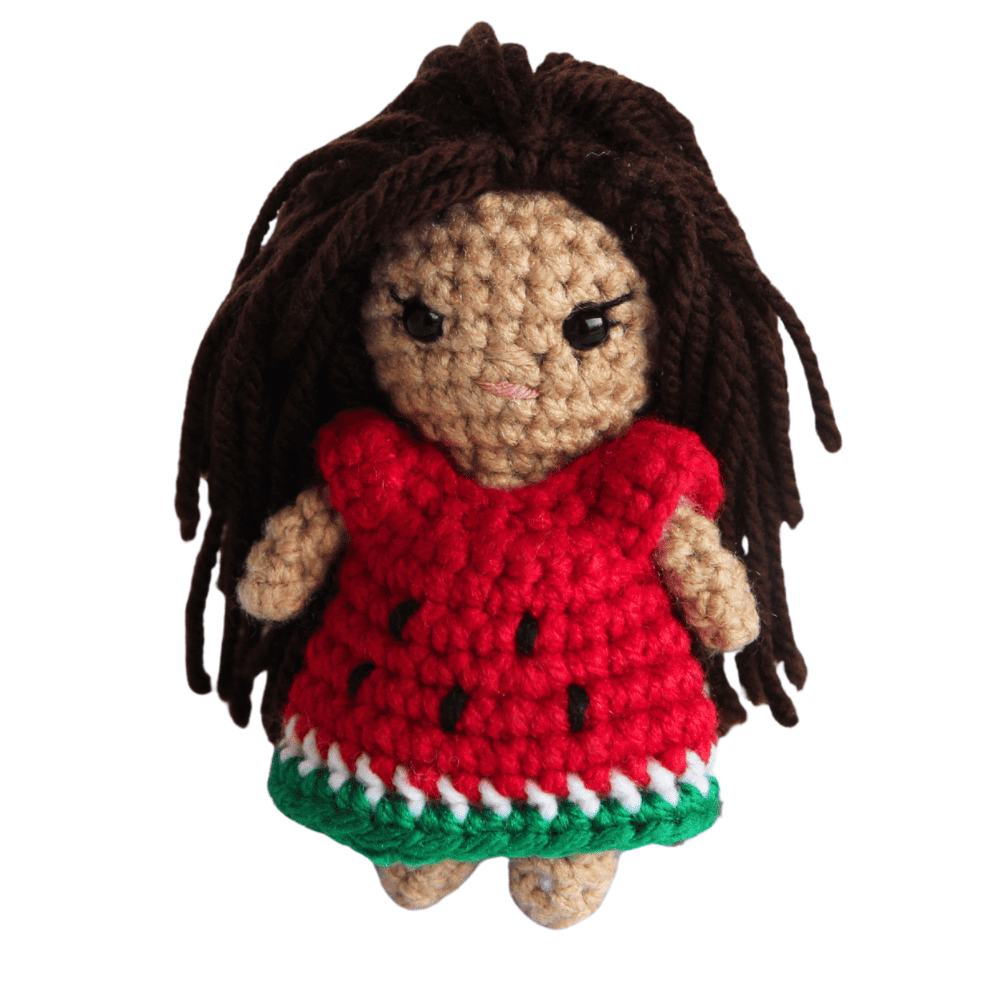
Keep going until the hair is even and doesn’t have clumps in it. If you find that the hair is too thick, keep brushing until it’s the texture that you want. Once you are satisfied, channel your inner stylist and give your doll a hair cut! And now your done! How great does her hair look!