Mini Christmas Crochet Elf Girl Doll Free Pattern
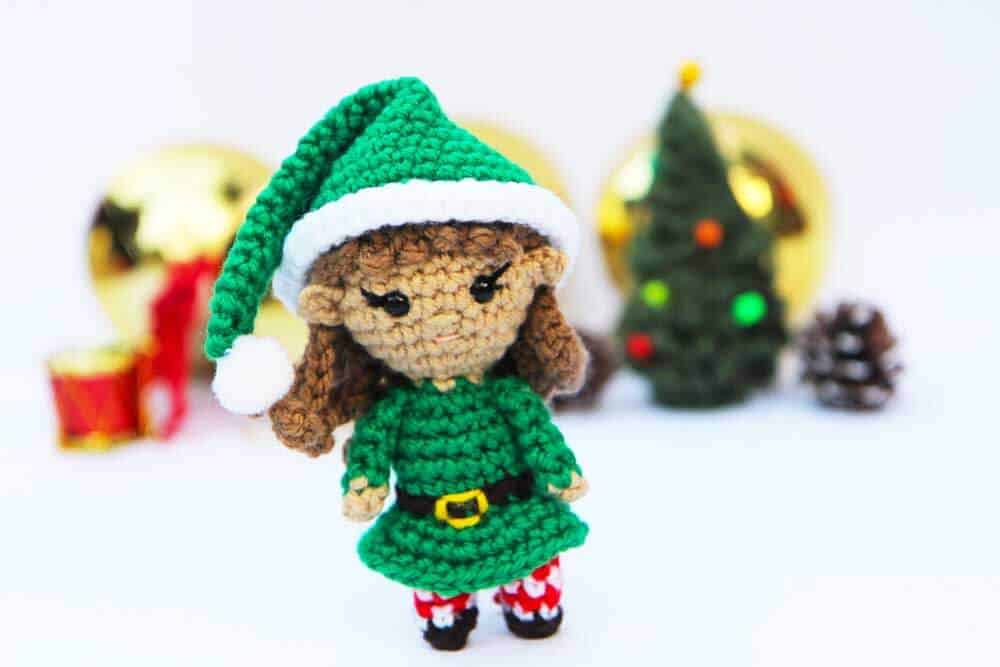
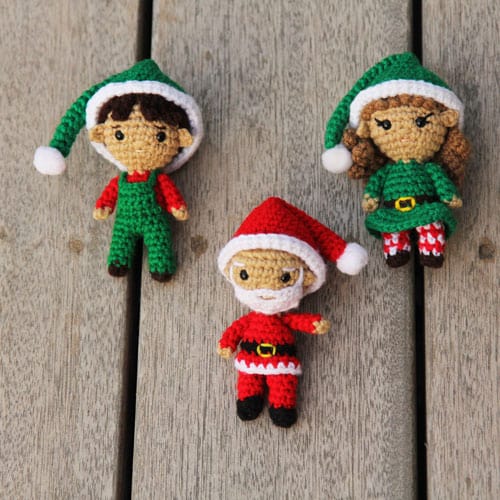
Ella, the mini Christmas crochet Elf, is a quick crochet Christmas gift or crochet ornament for your tree. Ella would also make a great Christmas crochet stocking stuffer. Like all the dolls in the Kozu Palm Pals mini crochet dolls series, this Christmas amigurumi Elf free pattern is just 4.5 inches tall, quick, easy, and just so cute!
Ella was made as a last minute crochet ornament for our Christmas tree. We don’t usually celebrate Christmas but, given the Pandemic, we thought the more reasons to celebrate, the better! Plus, it’s a really good way to teach the children about different cultures and celebrations. We were really excited about decorating a tree for the holidays because there are three of us in our family who do amigurumi and so we decided to decorate it with amigurumi ornaments. I wanted to make a Kozu Palm Pal crochet ornament and had been meaning to do it for a while but hadn’t gotten around to it. So, a couple days ago I decided to use the Kozu Palm Pals pattern to make a mini crochet elf for the tree. I wasn’t planning to put it up on the blog or anything since there wasn’t much time — it was just going to be for us. But when I finished crocheting this Christmas amigurumi elf was complete, I was in love! So, even though there is just over a week to go before Christmas, I decided to write it up and share this free pattern for anyone looking for a (very) last minute Christmas crochet project. The good thing is that like all the other dolls in the Kozu Palm Pals series, Ella the Christmas crochet Elf works up really fast, in less than 3 hours. Otherwise, there’s always next year, right?
Don’t miss Elliot the boy elf amigurumi doll that you can pair with her! We also have an adorable mini amigurumi Santa doll to complete the series!
Are we friends yet?
Join the Amigurumi with Chai Coffee Crochet Facebook group or follow us on Instagram, Facebook, and Pinterest.
If you would like an ads-free, print-friendly PDF version of our pattern, you can buy it from our Ravelry store.
Want to save this pattern for later? Save this pin to your Pinterest crochet board.
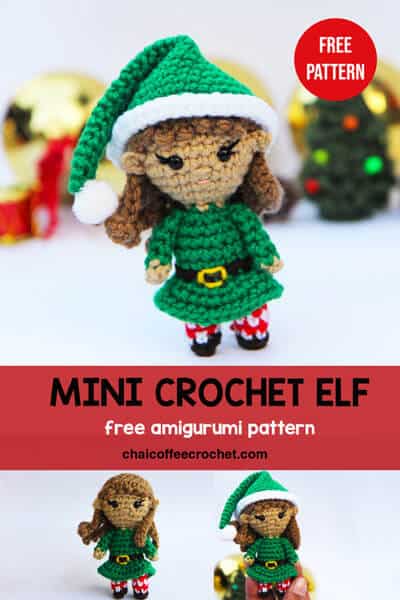
Christmas Amigurumi Crochet Elf Free Pattern
This pattern is for your personal use only and cannot be sold, copied, or reproduced in anyway without permission from the designers. You may sell finished objects made from this pattern but please give credit to chaicoffeecrochet.com as the pattern designers.
Materials
- Yarn: You need a small amount of DK yarn in green, skin colour, hair colour, brown, white, and red.
- 2.5 mm crochet hook
- Tapestry needle
- Stitch marker
- Polyfill stuffing
- Two 6 mm safety eyes
- Embroidery thread: A small amount of black for eyebrows, light pink for lips, and yellow for the belt buckle.
- One small white pompom (approx. 1.5 cm)
Finished size: Approximately 4.5 inches
Abbreviations
This pattern is written in US terms.
Sl st: slip stitch
SC: single crochet
INV DEC: invisible decrease
INC: two SC in the same stitch
BLO: back loops only
HDC: half double crochet
How to Crochet an Elf
Body
LEGS
Begin with brown
Stuff legs lightly as you go.
Round 1: 6 SC into a magic circle (6)
Change to white
Round 2: SC around in BLO (6)
Change to red
Round 3: SC around (6)
Change to white
Round 4: SC around (6)
Change to red
Round 5: SC around (6)
Change to white
Round 6: SC around (6)
Fasten off. Make sure that you’ve pulled the magic circle tight so that stuffing doesn’t escape from it.
Repeat rounds 1-6 for the second leg but don’t fasten off.
Body
Stuff as you go. Now we will begin joining the legs.
Using red yarn
Round 7: Chain 2 and SC in the next unworked stitch of the first leg. Place a stitch marker in this stitch to mark the start of your round. SC in the remaining 5 stitches of the first leg until you reach the chain, SC in each of the 2 chains, SC in the 6 stitches of the next leg, and SC on the other side of each of the two chains until you reach your stitch marker. (16)
Change to green
Round 8: SC in each stitch around (16)
Change to brown
Round 9: SC around in BLO (16)
Change to green
Round 10:SC around in BLO (16)
Round 11-12 (2 rounds): SC in each stitch around (16)
Round 13: (2 SC, INV DEC) four times (12)
Round 14: (2 SC, INV DEC) three times (9)
Change to skin colour.
Round 15: (SC, INV DEC) three times (6)
Head
Round 16: INC in each stitch around (12)
Round 17: (SC, INC) six times (18)
Round 18: (2 SC, INC) six times (24)
Round 19-23 (5 rounds): SC in each stitch around (24)
If you’re using safety eyes, insert them between Rounds 20 and 21, approximately four stitches apart. Once you are satisfied with the placement of the eyes, remove the eyes and embroider eyelashes. Reinsert the eyes and put the washer firmly on the back.
Ensure that you have stuffed the body well, especially the neck. I use the back of a scissor to get the stuffing in but you can use anything small enough to really push the stuffing in to ensure that the neck is firm! Continue stuffing the head.
Round 24: (2 SC, INV DEC) six times (18)
Round 25: (SC, INV DEC) six times (12)
Ensure that you have stuffed the head well.
Round 26: INV DEC six times (6)
Fasten off and leave a long tail to embroider the nose. Insert needle in front loop of each stitch and pull tight to close.
Skirt
Once the body is complete, turn it upside down and attach green yarn to the back of the doll, in the unworked front loops from Round 8.
Round 1: (SC, INC) eight times (24)
Round 2: (2 SC, INC) eight times (32)
Round 3: SC in each stitch around (32)
Fasten off and weave in the ends. Use yellow embroidery thread to embroider on the belt buckle.
Arms
Do not stuff
Begin with skin colour.
Round 1: 4 SC into a magic circle (4)
Change to green.
Round 2-6 (5 rounds): SC around (4)
Fasten off and leave a long tail for sewing. Sew onto the body between Round 13 and 14.
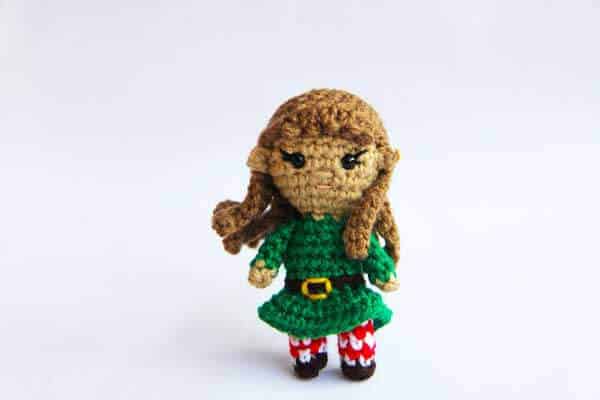
Hair cap & Embroidery
Use hair colour yarn
Round 1: 6 SC into a magic ring (6)
Round 2: INC in each stitch around (12)
Round 3: (SC, INC) six times (18)
Round 4: (2 SC, INC) six times (24)
Round 5-8 (4 rounds): SC in each stitch around (24)
Round 9: The hair cap instructions for this round can be confusing so I’m going to break them down into sections. Please note that the next section of bullet points are all for Round 9 of the hair cap:
- First we will begin by making five bangs in the front of the head: (Chain 4, starting from the second chain on the hook, 3 sl back down the chain, slip stitch in the next SC in the hair cap) five times
- 4 SC
- Now we will make 11 long strands of hair: *Chain 10. Starting from the second chain from the hook, 9 SC. You should now be at the bottom of your chain. Sl st into the next SC of the hair cap.* Repeat the part between ** for a total of 11 times to make 11 long strands of hair.
- 4 SC.
- Slip stitch into the first stitch of this Round.
Fasten off, leaving a long tail for sewing. Put pins to position the bangs where you would like them to be. As you are sewing on the hair cap, make one stitch into each of the bangs to hold them in place.
Using the skin coloured yarn tail that you have left from closing the doll, embroider a nose onto your doll, one row below the eyes. Embroider the mouth, one row below the nose.
Ears (make 2)
Round 1: Make a magic circle and SC, chain 2, SC inside the circle.
Fasten off and leave a long tail for sewing. Sew onto the head approximately 3 stitches away from the eyes, at the edge of the hair cap.
Hat
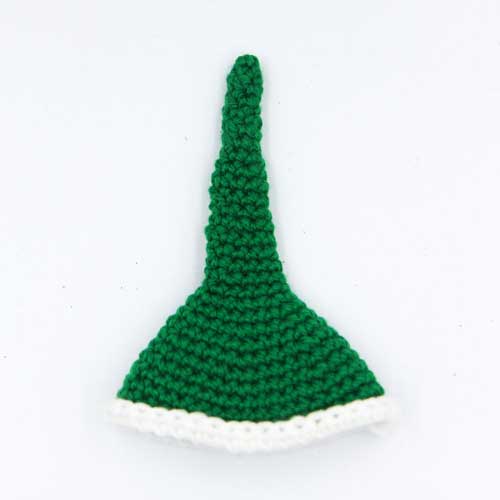
Use green yarn.
Round 1: 4 SC into a magic circle (4)
Round 2: SC in each stitch around (4)
Round 3: 3 SC, INC (5)
Round 4: SC in each stitch around (5)
Round 5: 2 SC, INC, 2 SC (6)
Round 6: SC in each stitch around (6)
Round 7: 5 SC, INC (7)
Round 8: SC in each stitch around (7)
Round 9: 3 SC, INC, 3 SC (8)
Round 10: SC in each stitch around (8)
Round 11: 7 SC, INC (9)
Round 12: SC in each stitch around (9)
Round 13: 4 SC, INC, 4 SC (10)
Round 14: SC in each stitch around (10)
Round 15: 9 SC, INC (11)
Round 16: SC in each stitch around (11)
Round 17: 5 SC, INC, 5 SC (12)
Round 18: SC in each stitch around (12)
Round 19: (SC, INC) six times (18)
Round 20: SC in each stitch around (18)
Round 21: (2 SC, INC) six times (24)
Round 22: SC in each stitch around (24)
Round 23: (3 SC, INC) six times (30)
Round 24: SC in each stitch around (30)
Round 25: (4 SC, INC) six times (36)
Round 26-28 (3 rounds): SC around (36)
Change to white. Leave a long tail of green yarn to sew the hat onto the head.
Round 29: SC around and sl st to the first SC of the round to join. Chain 1 (36)
Round 30: HDC around and sl st to the first HDC of the round to join (36)
Fasten off and flip the last row up. Fasten off and put a couple stitches with white yarn to ensure that it stays up. Weave in the ends.
Sew on a small white pompom to the end of the hat and sew the hat onto the head of the elf. Fold the hat down to one side of the head and put one stitch in green to hold it in place.
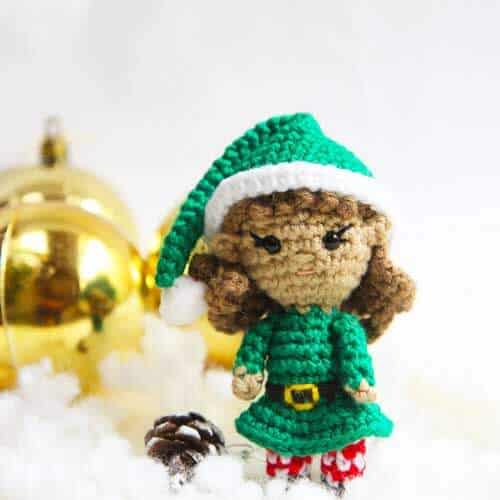
Your Ella the Christmas Elf is now complete! We hope you enjoyed this crochet elf free pattern. We would love to see your finished toy, so share them on our Facebook group Amigurumi with Chai Coffee Crochet or tag us on Instagram @chaicoffeecrochet We like to share a selection of makes from our patterns in our stories and highlights.
If you enjoyed this pattern, why not try some of our other free patterns? Click on the photo below to find the free pattern.
