Learn how to Strengthen the Neck of Amigurumi
One of the most frustrating things when you crochet a doll is to realize that the head is floppy. Suddenly your cute doll suddenly looks like a bobble head doll – help!
For cuteness, we often crochet dolls and toys with heads that are proportionately larger than their bodies. We’re not sure why that makes them super cute but, well, it does! Then we add all this hair and so this head is super heavy for the tiny body. So what happens? Floppy head!
The good thing is that this is a really easy thing to prevent. In this tutorial we will how you our favourite way to prevent wobbly heads for your crochet dolls! We will also discuss how to prevent head wobble in amigurumi toys with a wider neck and where the head is sewn on separately.
Want to save this for later? Save this pin to your Pinterest crochet board.

How to Prevent Head Wobble in Crochet Dolls
Most crochet dolls have thin necks with really large heads, making them at risk of having floppy heads. The good news is that it’s quite simple to prevent your cute crochet doll from looking like a bobble head doll! Our step-by-step tutorial will show you how to do this. This method works not just for dolls that are crocheted in one piece, but also those where the head is separate but the neck is thin.
Step 1: Crochet a tube slightly smaller than the neck of your doll
The first step is to crochet a tube that is slightly smaller than the neck of your doll. It’ll usually be around the size of the arm of your doll. For our Zoya and Zayd crochet doll series, we crochet a tube of 8 stitches wide (and the neck is 12 SC wide). We make 8 SC into a magic circle and then crochet one SC in each stitch until it’s the desired height (approximatly 2.5 to 3 inches).
Use a yarn that is the same or lighter than the yarn you’re using for your doll to ensure that it doesn’t show through. The tube is a great way to use some leftover scrap yarn!
Some times people recommend using foam rollers or other tubes. We don’t like using those because they could, over time, get dislodged and you’d go from a floppy neck to no neck at all! And this tube is so simple to crochet!
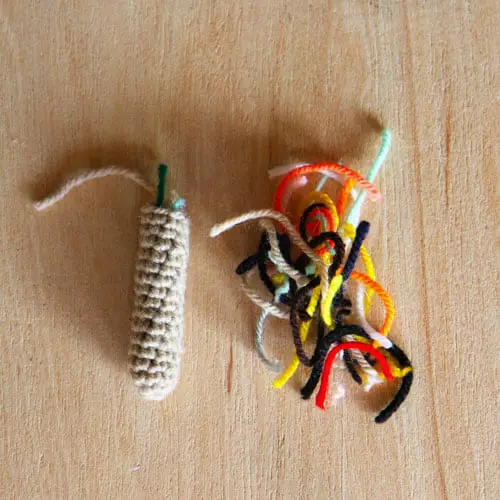
Step 2: Stuff, stuff, and stuff the tube
We then stuff the tube a lot- like A LOT! To stuff it, we usually use leftover scrap yarn that we have (you know those tiny scraps – we save them in a ziplock bag for just this purpose!). Stuff it as much as you can so that it’s really firm and will hold up the head! Use the end of a scissor to get the stuffing really packed in there.
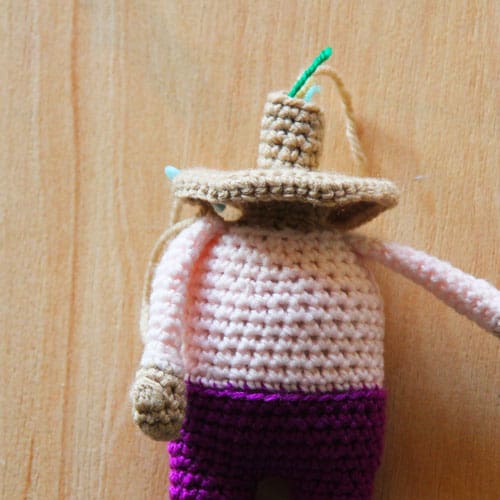
Step 3: Insert the tube into the neck of your doll
Insert the tube into the neck of your doll. The tube should be halfway into the body or your doll and the other half in the head of your doll. Make sure that it’s well stuffed and feels stable. If the head is being sewed on separately, put it through the neck and then put head on over this tube.
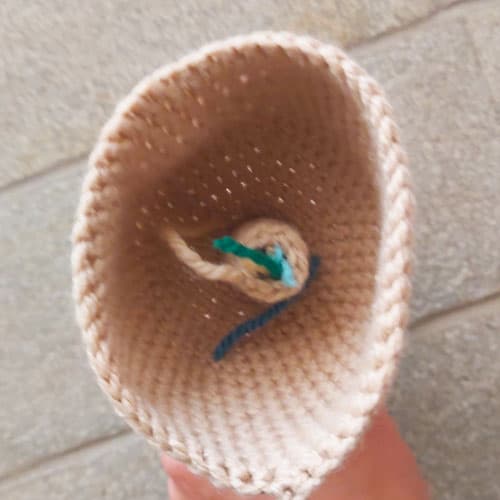
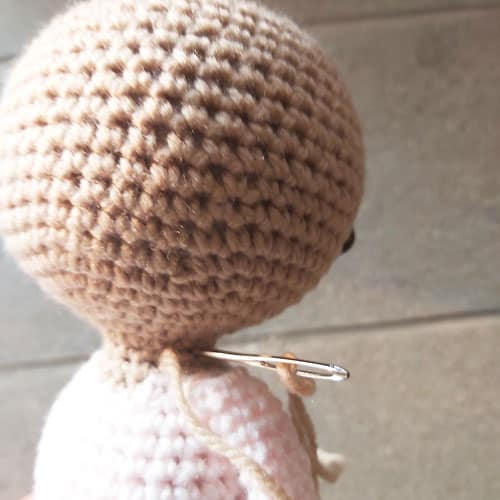
Step 4: Insert 2-3 passes into the neck of your doll, through the tube, to ensure that it stays in place
This last step is super important. When kids play with dolls, things move around. And that can include your awesome neck tube! (This is why we recommend crocheting a tube, rather than using something like a foam roller that can move out of place.)
So once you’re done with the head, you can take the yarn that you fasten off and bring it out in the neck of your doll. Now make two to three passes in the neck and through the tube to hold it in place.
And voila, that’s it! Your doll head should now be stable – yay!
How to Avoid Floppy Head in Amigurumi with Wider Necks
If you are working on toys (usually animals) that have wider necks and the head is sewed on separately, you may be wondering how to prevent head wobble. Here are some tips that will help:
1. Stuff the neck well
Under stuffing can cause the neck to become floppy so ensure that both the head and the body are stuffed well. You don’t want to overstuff them, as that can cause your amigurumi to lose shape. As you are sewing the head onto the body, as you’re closing it up, add some extra stuffing to ensure that the neck is properly stuffed.
2. Sew the pieces on tightly
As you’re sewing the head onto the body, make sure that you are sewing it on tightly. If the stitches are too loose, this could cause the head to become floppy. So pull tight after each stitch. Remember to add additional stuffing as you sew.
3. Make a few passes across the neck to ensure that it is tightly sewed in place
Once you have joined the two pieces, take your needle and make a few passes across the neck, from one side to another. This should help keep the neck firmly in place, with the head firmly onto the body.
The neck should now be firmly in place! Before fastening off just ensure that it is.
How to Fix Floppy Head in Amigurumi
It’s all well and good to learn how to prevent floppy head in a doll but what do you do if you have already finished the doll and then realize that the head is flopping over? Well, there is no magic elixir for this. However, here are a few things that you can try:
Option 1: Open the last few rounds of the head
If the doll is worked from the bottom up, you could open the last few rounds of the head and add in my stuffing. Use a long chopstick or pencil to get more stuffing into the neck and then close up the doll.
Option 2: Add a couple of stitches from the neck to the shoulder of the doll
You could try squishing the head down a little and making a few passes from the head to the shoulder of your doll. This will reduce the size of your neck, unfortunately. But it may be preferred to a floppy head.
Option 3: Add a scarf
You could crochet a scarf for your amigurumi. Wrap the scarf around the neck of your doll. Then sew it in place, giving it a little more stability.
Option 4: Gift is as it is
Sometimes, we are our own worst critics. If you gift it to a child, the chances they won’t care (or even notice the wobbly head!). We are often perfectionists but children really aren’t. Sometimes I will go to a friend’s house and see the floppy-headed doll that I crocheted for her kids as a beginner. Those dolls are really loved – the kids haven’t even noticed there’s something wrong!
We hope this tutorial was helpful!