The buzz around our house these days is this new crochet bee pattern! You won’t bee-lieve how cute it is! haha. Okay, I will stop with the puns. But seriously, this small crochet bee pattern is truly the bees knees (oops!). I especially love it because it was a collaboration between me and Juna (Kiran’s 8 year old son – the one who our Juna Series of easy crochet animals is named after!). These days he’s trying to learn crochet and I decided that a bee would be the easiest thing for him to begin with. So I asked him to draw me a bee and he drew me this adorable bee and then I created this pattern! I loved the design process of working with him to crochet the bee. (He and I agreed to leave off the legs when I told him that his bee wouldn’t be able to stand on them if we crocheted them in!) Next, he and I will crochet it together!

I really love the design of this bee. For one thing, unlike most crochet bees, it has a stinger – a bee definitely needs a stinger! Plus I love that it works up really fast. I timed myself making it myself today (and I’m a really super slow crocheter – crochet is a relaxing activity for me so I do it very slowly and mindfully!) and it took me under an hour to crochet – sewing included. So I think it would take most people between 30 minutes to an hour. I also love that it’s a low sew pattern – you just have to sew on the wings. This small bee size is fun – it would make for a cute crochet keychain for your next craft fair.
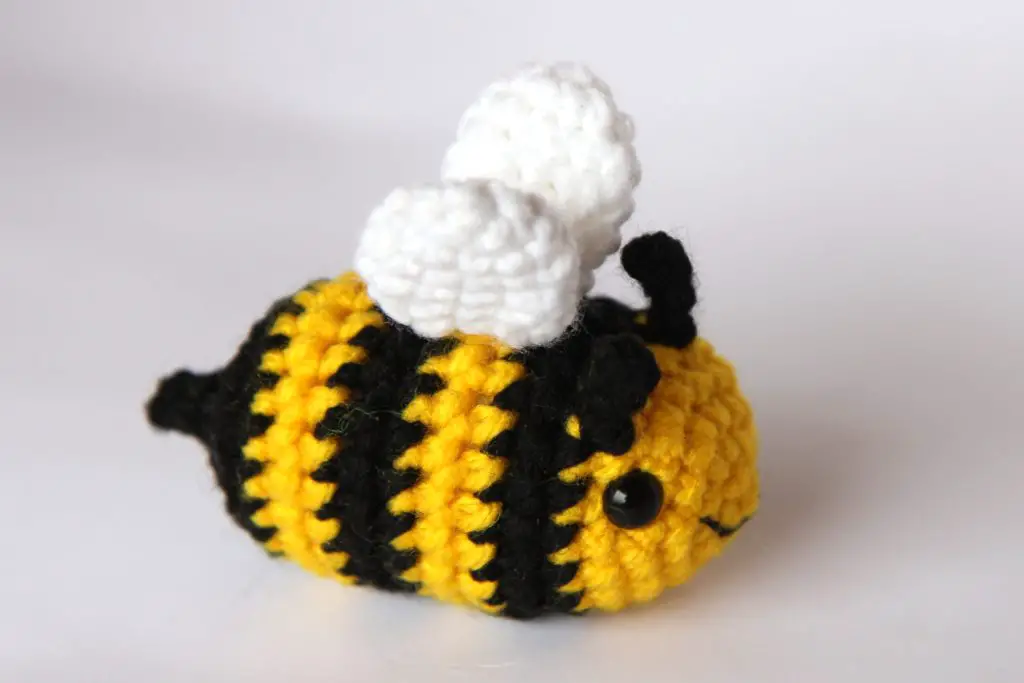
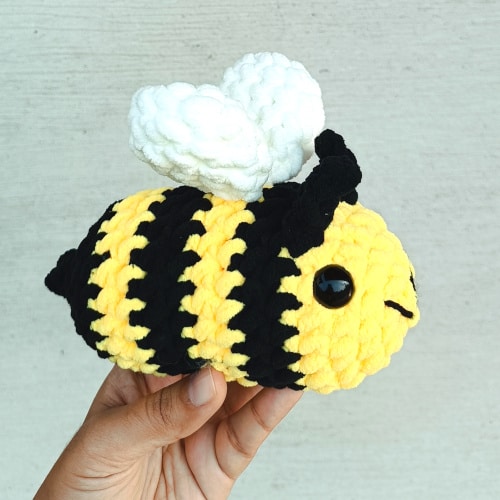
Of course, with my new obsession with super bulky yarn, I had to crochet this bee in blanket yarn and I really loved how she turned out! She is a cute little 7.5 inch cuddly crochet bee and still works up super fast – so again, a great craft fair project!

Let’s get started!

If you prefer an ads-free print-friendly PDF of this small crochet bee, you can buy it in our Ravelry Store.
Small Crochet Bee Free Pattern
This pattern is for your personal use only and cannot be sold, copied, or reproduced in any way without permission from the designers. You may sell finished objects made from this pattern in small quantities but please give credit to chaicoffeecrochet.com as the pattern designer.
Tools & Supplies You Will Need
- Yarn: You need a very small amount of yarn in yellow, black, and white
- 2.75 mm crochet hook
- Tapestry needle
- Stitch markers
- Polyfill stuffing
- Two 7 mm safety eyes
Stitches Used & Abbreviations
This pattern is written in US terms and crocheted in continuous rounds unless specified otherwise.
You will need to know the following stitches and techniques for this pattern:
Sl st: slip stitch
SC: single crochet
INV DEC: invisible decrease
INC: two SC in the same stitch
Pattern Notes & Tips
- Difficulty level: Easy
- Finished size: Approximately 3 inches long, using DK yarn.
- This pattern is written in US terms.
- This pattern is crocheted in continuous rounds unless specified otherwise. Use a stitch marker on the first stitch of every round so that you don’t lose track of the start of your round.
- For a more seamless colour change, make a slip stitch instead of single crochet in the first stitch of each new colour. This allows the jog in the colour change to be less noticeable.
- This bee was made using DK yarn. However, you may use any yarn with the relevant hook. Usually, for amigurumi you go down 2- sizes from that recommended on the yarn label.
- This bee is a really easy pattern and is suitable for beginners. However, beginners may find black yarn difficult to work with (it’s hard to see the stitches!) so they may want to try the bee in other colours. A rainbow bee would be so much fun!
Sizing Adaptations for Your Crochet Bee
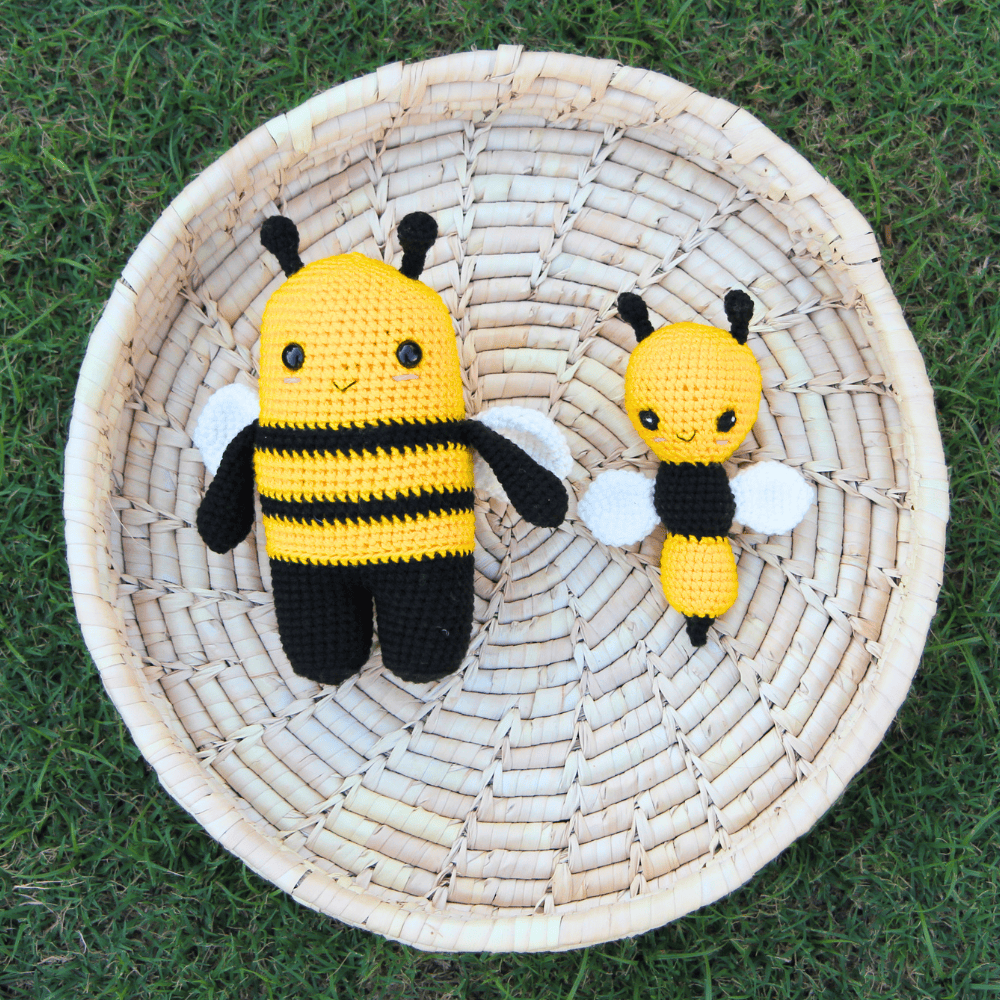
You can make this bee in multiple sizes. With DK yarn, a 2.75mm hook, and 7mm safety eyes, this bee turned out to be approximately 3 inches. With super bulky blanket yarn, a 7 mm hook, and 16mm safety eyes, it was approximately 7.5 inches in length.
How to Crochet a Bee
Body
Begin with yellow
Stuff as you go
Round 1: 5 SC into a magic circle (5)
Round 2: INC in each stitch around (10)
Round 3: (SC, INC) five times (15)
Round 4: (2 SC, INC) five times (20)
Round 5: SC around (20)
Change to black
Round 6-7 (2 rounds): SC around (20)
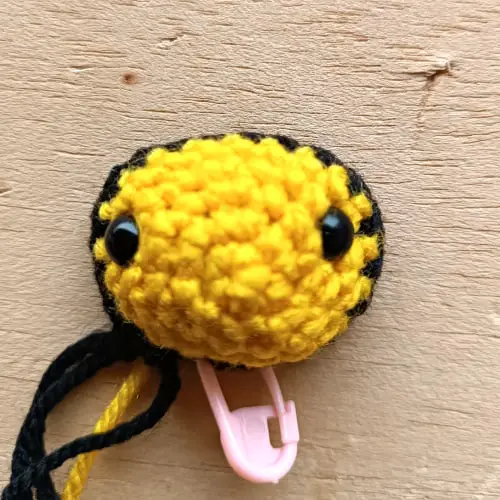
Insert eyes between Rounds 4 and 5 on either side of your bee’s head.
Change yellow
Round 8-9 (2 rounds): SC around (20)
Change to black
Round 10-11 (2 rounds): SC around (20)
Change to yellow
Round 12-13 (2 round): SC around (20)
Change to black
Make sure your bee is well stuffed
Round 14: SC around (20)
Round 15: (2 SC, INV DEC) five times (15)
Round 16: (SC, INV DEC) five times (10)
Round 17: INV DEC five times (5)
Round 18: SC around (5)
Fasten off. Insert the needle in front loop of each stitch and pull tight to close. Weave in the ends.
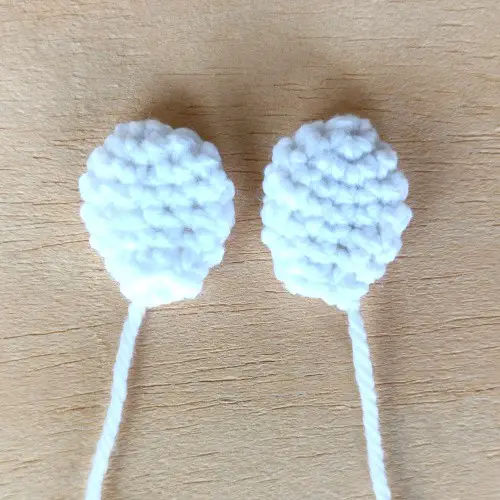
Bee Wings (make 2)
Using white
Round 1: 6 SC into a magic circle (6)
Round 2: INC in each stitch around (12)
Round 3-4 (2 rounds): SC around (12)
Round 5: (2 SC, INV DEC) three times (9)
Round 6: SC around (9)
Round 7: (SC, INV DEC) three times (6)
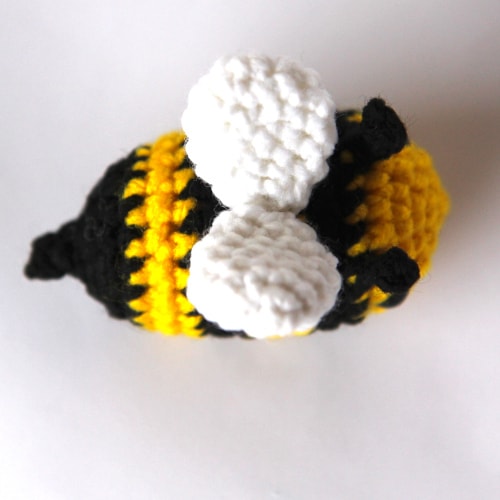
Fasten off and leave a long tail for sewing. Sew the wings on the top of your bee, centered to the top, between Rounds 8 and 10.
Antennae (make 2)
Using black

Insert your hook at the top of the head of your bee, between Rounds 5 and 6 and sl st to attach.
Chain 4. Starting from the second stitch from your hook, sl st in each of the next three chains. Sl st into the same stitch on the head of your bee where you started. Fasten off and weave in the ends.
Embroider a smile onto your bee.
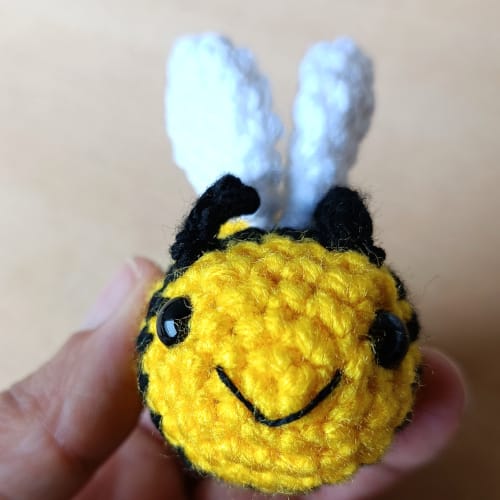
Your small crochet bee is now ready!
Is it easy to crochet a bee?
Yes, it is easy to crochet this bee! It requires all the basic techniques for amigurumi (magic circle, single crochet, crocheting in the round, colour changes) so it’s a great way for a beginner to familiarise themselves with amigurumi. The only tricky part can be working with black yarn. Because it’s dark, it’s hard to see the stitches and someone unfamiliar with crochet may struggle. So for absolute beginners, we would recommend using an alternate colour to black (because it doesn’t have to be realistic!). A rainbow bee would be so cute, wouldn’t it?
How long does it take to crochet a small bee?
This bee takes less than an hour to crochet. The actual time it takes will depend on how fast you crochet. But since it works up so fast, it is an awesome quick pattern to crochet in bulk – or for your next craft fair.
How do you crochet a large bee?
If you would like to crochet a large bee, you can use thicker yarn and a larger hook. With super bulky blanket yarn, this crochet bee turned out to be 7.5 inches long and just the cutest cuddly companion! You can crochet this large bee in less than an hour, which is awesome.
If you would prefer a larger bee without changing the yarn weight, try out our amigurumi bee stuffed toy (approximately 8 inches tall) or our crochet bee rattle (approximately 6 inches).
What yarn do you need to crochet a bee?
As with most amigurumi, you can use any yarn you like. Acrylic or cotton are usually popular choices of yarn for amigurumi. We use DK yarn and several of our pattern testers use worsted weight. Super bulky yarn is also a good option if you want a large (and cuddly!) bee. You just have to know that the weight of the yarn that you use will impact the size of your bee (the thicker the yarn, the larger the bee!). And with any weight of yarn, you need to use the correct hook. Typically, for amigurumi you go down 2-3 hook sizes from that written on the yarn label, as amigurumi requires a smaller hook because you want a tighter weave to ensure that you don’t have holes in your piece where the stuffing will show.
How to do you crochet a bee keychain?
This small bee would make for an adorable crochet keychain! So if you would like to turn this little bee into a keychain, you can find a keychain ring with a jump ring. You can use pliers to open the jump ring, hook it into the top of your bee around a stitch, and then use the pliers to close the jump ring. If you don’t have pliers, another way would be to use a lenght of yarn and sew the keychain onto your bee.