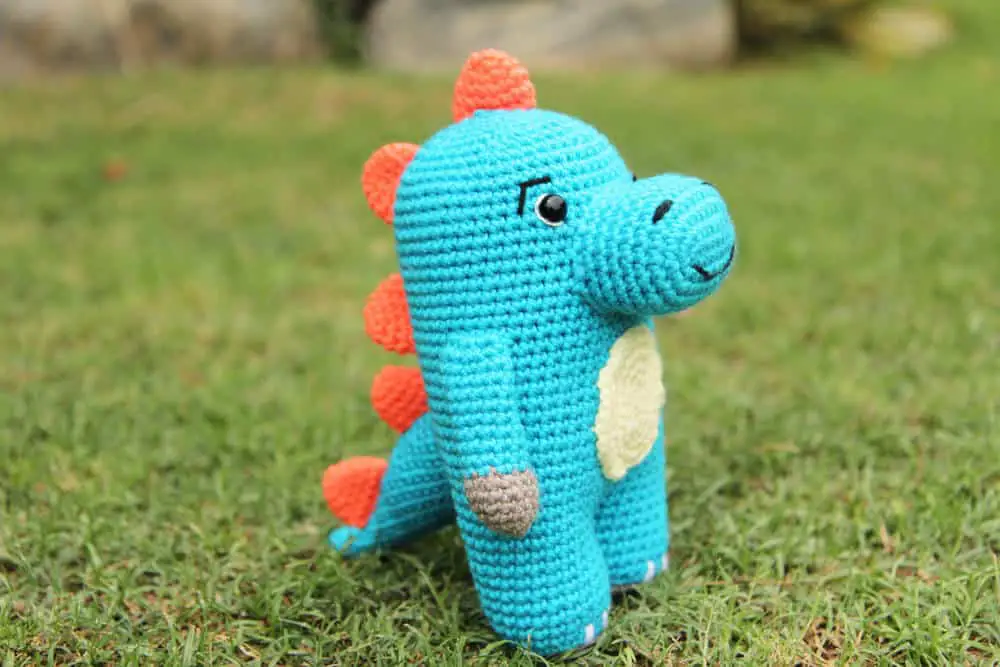
Meet our sweet crochet dinosaur, Dewey! If your child loves dinosaurs as much as my nephews, you will just love this crochet dinosaur free pattern. My nephews are always super interested in different dinosaur types – are you crocheting a stegosaurus or a brontosaurus? My reply? He’s a Genernic-asaurus. Lol.
It’s really fun to crochet dinosaurs because you can use any colour combination that you like – since no one has actually seen a dinosaur, who can argue with you about your yarn colour choices? So you can grab the leftover scrap yarn from your work basket and get started on this cutie. (A win-win: you crochet a cute dinosaur PLUS you can use up your stash so that you can go buy more yarn! Woohoo!)
We also have a super cute matching dinosaur baby rattle that you can pair with this guy for the cutest little baby set for your next baby shower!
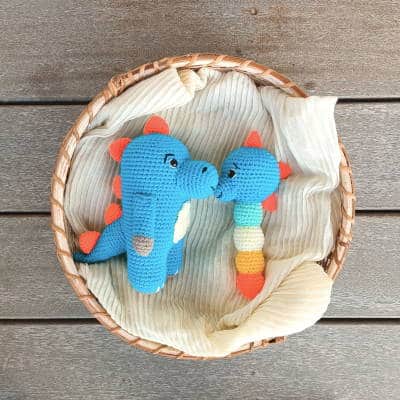
About this Crochet Dinosaur Pattern
In this pattern, we will show you how to crochet a dinosaur, step-by-step. This dinosaur works up to approximately 8 inches. However, if you would prefer to crochet a large dinosaur, you can always use a more chunky yarn for the pattern.
This pattern is very simple. If you’re looking for an easy crochet dinosaur pattern, this is for you! Most of the parts of the dinosaur can be crocheted on – you just have to sew on the muzzle and the spikes! How’s that for awesome?
This dinosaur is part of our Juna Series of amigurumi animals – so once you’re done with this guy you can work your way through the series!
This pattern was initially released as a Crochet Along (or a CAL) and we have just LOVED seeing all the unique dinosaurs crocheted all around the world! CALs are so much fun because everyone takes the same pattern but puts their own creative spin on them to really make them stand out! If you want to join in on our future CALs, sign up for our newsletter to stay updated on our next one!
Finished size: Approximately 8 inches tall.
If you would like an ads-free, print-friendly PDF version of our pattern, you can buy it from our Ravelry store.
Want to save this pattern for later? Save this pin to your Pinterest board.
Crochet Dinosaur Free Pattern
This pattern is for your personal use only and cannot be sold, copied, or reproduced in anyway without permission from the designers. You may sell finished objects made from this pattern but please give credit to chaicoffeecrochet.com as the pattern designers.
Tools & Materials You Will Need
- Yarn: Less than 100 grams of DK yarn in the main body colour and a small amount in three colours for the belly patch, spikes, and the hands and feet. Scrap yarn in white and black for embroidery. We use DK yarn but worsted weight/aran yarn will work just as well.
- 3mm crochet hook
- Tapestry needle
- Stitch marker
- Polyfill stuffing
- Two 10 mm safety eyes or you can crochet eyes for children under 3
- Embroidery thread in black for the smile and white for the eyes
Crochet Stitches and Abbreviations
This pattern is written in US terms and crocheted in a spiral unless stated otherwise.
Sl st: slip stitch
Ch: Chain
SC: single crochet
INVDEC: invisible decrease
INC: two SC in the same stitch
BLO: back loops only
How to Crochet your Dinosaur
Below is the step-by-step instructions on how to crochet your dinosaur.
Muzzle
Tip: The base shape of the muzzle is an oval, so we will be crocheting around chain, rather than a magic circle as we usually do with amigurumi. If you are new to crocheting around a chain, we have a tutorial on how to crochet an oval for amigurumi.
Using the body colour
Round 1: Ch 10. Starting in the second chain from the hook, 8 SC, 3 SC in the next chain as your work turns. Now continue on the other side of the chain. 7 SC and INC in the last chain (20)
Round 2: INC, 7 SC, (INC) in each of the next three stitches, 7 SC, (INC) in each of the next two stitches (26)
Round 3: SC, INC, 7 SC, (SC, INC) three times, 7 SC, (SC, INC) twice (32)
Round 4-9 (6 rounds): SC around (32)
Fasten off and leave a long tail for sewing.
Arms (make 2)
Using the hands and feet colour yarn
Round 1: 6 SC into a magic circle (6)
Round 2: INC in each stitch around (12)
Round 3: (5 SC, INC) twice (14)
Round 4-5 (2 rounds): SC around (14)
Round 6: (5 SC, INVDEC) twice (12)
Stuff the bottom of the arms lightly.
Change to the body colour.
Round 7: (4 SC, INVDEC) twice (10)
Round 8-16 (9 rounds): SC around (10)
Tip: If you want to attach the arms using crochet when you make the body (it’s a really easy no-sew way!), see our tutorial on crocheting arms to your amigurumi to see how to finish off the arms.
If you prefer to sew the arms to your dinosaur, fasten off and leave a long tail for sewing. Do not stuff the rest of the arm.
Legs (make 2)
Stuff legs lightly as you go.
Using grey yarn
Round 1: 6 SC into a magic circle (6)
Round 2: INC in each stitch around (12)
Round 3: (SC, INC) six times (18)
Round 4: (2 SC, INC) six times (24)
Change to body colour
Round 5: SC in BLO around (24)
Round 6-12 (7 rounds): SC around (24)
Fasten off for the first leg. Leave a long tail for sewing to sew the hole between the legs of your dinosaur when joining.
Repeat rounds 1-12 for the second leg but don’t fasten off.
Body
Now we will join the legs of our dinosaurs. If you are unfamiliar with this, we have a tutorial on how to join legs for amigurumi.
Round 13: Sl st into the first unworked stitch of the first leg. SC in the remaining 23 stitches of the first leg and the 24 stitches of the second leg. (48)
Use the yarn tail from the first leg to sew closed any hole remaining between the legs.
Round 14-41 (28 rounds): SC around (48) *
*If you are crocheting on the arms for your dinosaur, you will attach them in Round 28. See the tutorial on how to crochet on the arms for instructions. If you are planning on sewing on the arms, you will sew them on once we are done with the body.
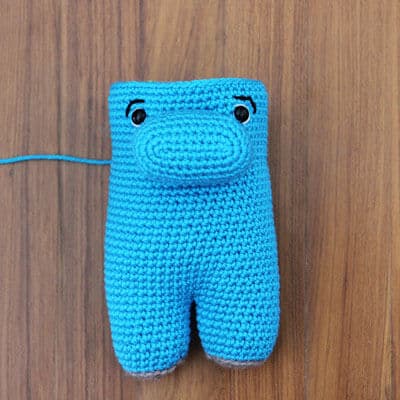
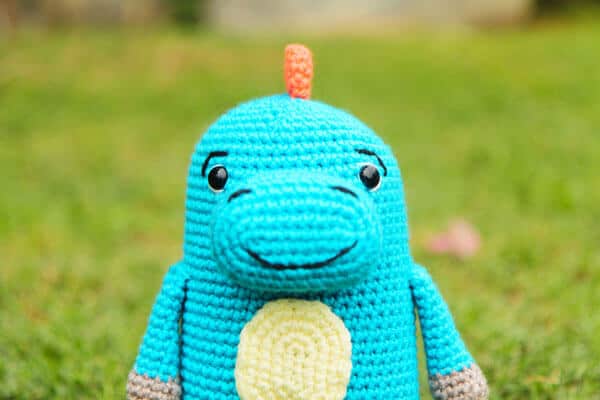
At this point, stuff the muzzle and sew it on between rounds 30 and 37. Insert the eyes between rounds 36 and 37, 11 stitches apart, centred to the muzzle. Using white embroidery thread, embroider on the whites accents on the eyes and use black yarn to embroidery the eyebrows. Stuff the body.
Round 42: (6 SC, INVDEC) six times (42)
Round 43: (5 SC, INVDEC) six times (36)
Round 44: (4 SC, INVDEC) six times (30)
Round 45: (3 SC, INVDEC) six times (24)
Round 46: (2 SC, INVDEC) six times (18)
Round 47: (SC, INVDEC) six times (12)
Ensure that the body is stuffed firmly.
Round 48: INVDEC six times (6)
Fasten off. Insert needle in front loop of each stitch and pull tight to close.
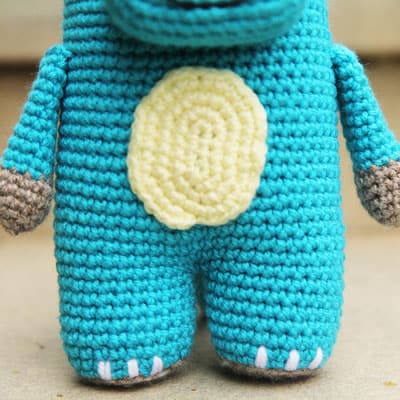
Use black yarn to embroider on the nostrils. The nostrils should be 5 stitches apart, by making two passes with the yarn over 3 stitches. Use black embroidery thread to embroider on a smile. Use a scrap of white yarn to embroider on three claws on each leg. The claws should be made by making two passes over 2 stitches, with two stitches between claws. If you haven’t yet attached the arms, sew them on between Rounds 28 and 29.
Belly Patch
Use the belly batch colour. Like the muzzle, the dinosaur’s belly patch is also crocheted in an oval.
Round 1: Ch 5. Starting in the second chain from the hook, INC, 2 SC, 4 SC in the next chain as your work turns. Now continue on the other side of the chain. 2 SC and INC in the last chain (12)
Round 2: (INC) twice, 2 SC, (INC) in each of the next four stitches, 2 SC, (INC) in each of the next two stitches (20)
Round 3: (SC, INC) twice, 2 SC, (SC, INC) four times, 2 SC, (SC, INC) twice (28)
Round 4: (2 SC, INC) twice, 2 SC, (2 SC, INC) four times, 2 SC, (2 SC, INC) twice (36)
Fasten off, leaving a long tail for sewing. Sew the patch onto the belly of your dinosaur between Round 16 and 26.
Tail
Use the body colour
Round 1: 6 SC in a magic circle (6)
Round 2-3 (2 rounds): SC around (6)
Round 4: (SC, INC) three times (9)
Round 5-6 (2 rounds): SC around (9)
Round 7: (2 SC, INC) three times (12)
Round 8-9 (2 rounds): SC around (12)
Round 10: (3 SC, INC) three times (15)
Round 11-12 (2 rounds): SC around (15)
Round 13: (4 SC, INC) three times (18)
Round 14-15 (2 rounds): SC around (18)
Round 16: (5 SC, INC) three times (21)
Round 17-18 (2 rounds): SC around (21)
Round 19: (6 SC, INC) three times (24)
Round 20-21 (2 rounds): SC around (24)
Round 22: (7 SC, INC) three times (27)
Fasten off and leave a long tail for sewing.
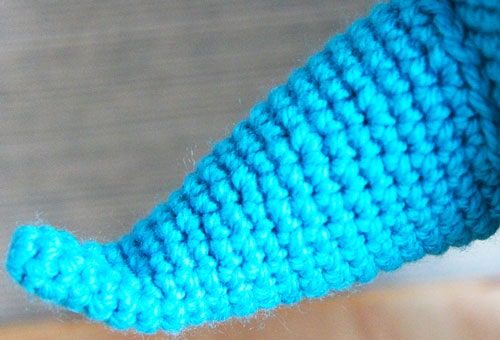
Stuff the tail lightly but leave the bottom of the tail unstuffed. Sew the tail onto the back of your dinosaur between rounds 16 and 24.
Spikes (make 5)
Using the spikes colour
Round 1: 6 SC into a magic circle (6)
Round 2: (SC, INC) three times (9)
Round 3: (2 SC, INC) three times (12)
Round 4-5 (2 rounds): SC around (12)
Fasten off and leave a long tail for sewing.
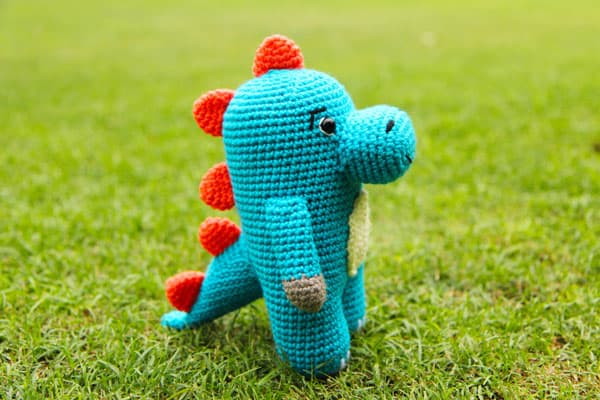
Sew the spikes onto the back of your dinosaur, evenly spaced. Pin the spikes onto your dinosaur before sewing to ensure that you are satisfied with the spacing. Start pinning on the spikes on either end (the one on the head and the bottom of the tail) and then work your way toward the centre to ensure that the spacing is even.
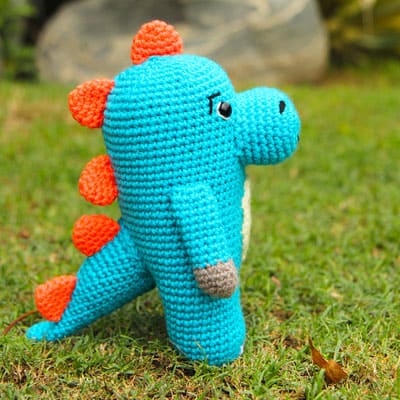
You have finished crocheting your dinosaur – yay!!!!
We would really love to see your crocheted dinosaurs – it’s so much fun seeing the fun colours everyone uses and their unique creativity on the pattern! Please share them on our Facebook group or on Instagram, tagging us @chaicoffeecrochet and using the hashtag #chaicoffeecrochetcal
If you enjoyed this, be sure to check out the other amigurumi animals in our Juna Series.
