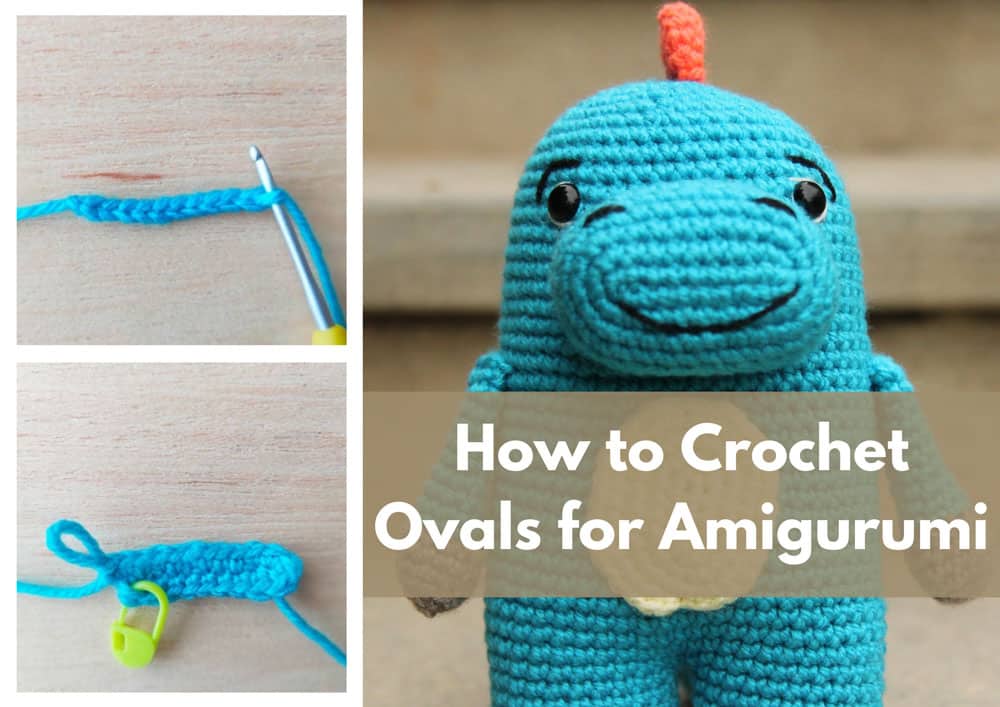
Ovals are a very common shape used in crochet. They are used as the base of bags and shoes. In amigurumi, they are used in a lot of animal muzzles, as the bases of doll shoes, belly patches, or just to have a nice oval shape for your amigurumi. Basically, we crochet a lot of ovals!
Ovals are crocheted around a chain in spiral rounds for amigurumi. If you’re a beginner, crocheting around a foundation chain can feel really daunting! You know how to do a magic circle but how how do you crochet amigurumi with a starting chain? Not to worry – it’s really easy once you understand what you need to do!
In this tutorial we will explain everything you need to know to crochet an oval! From showing you how to crochet around a chain to helping you understand how ovals are designed so that you can even design your own – this tutorial has everything we know about crochet ovals!
Want to save this tutorial for later? Pin this pin to your Pinterest Board.

How to Crochet Around a Chain
When a pattern asks for us to crochet an oval, the instructions begin with a foundation chain that we have to crochet around.
We are going to do a step by step tutorial on how to crochet around a chain, using an example with the following instructions:
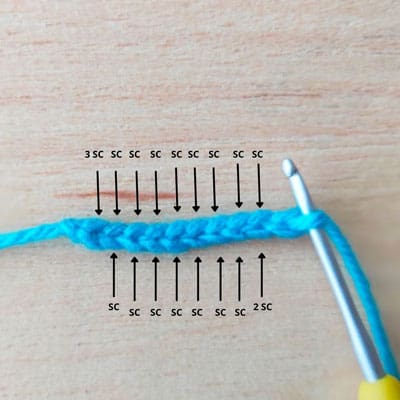
Round 1: Ch 10. Starting in the second chain from the hook, 8 SC, 3 SC in the next chain as your work turns. Now continue on the other side of the chain. 7 SC and INC in the last chain (20)
However, even if your pattern is a little different or has a different number of starting chains, the method will be the same and, once you understand how to do it, you can apply it to any pattern.
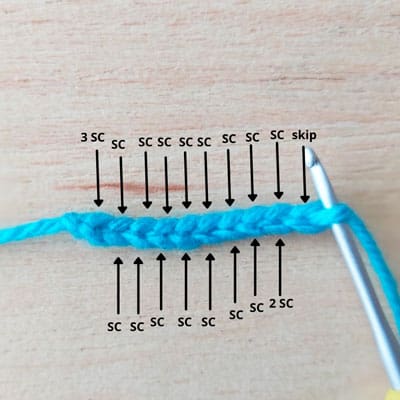
Essentially, what we are doing is crocheting on both sides of a chain. Each chain is a sideways V isn’t it? So when we are on the first side of the chain, we crochet through the \ part of the V and on the second side of the chain we crochet through the / part of the V. The diagram below shows what you need to do in each stitch, for this pattern.
But let’s do it together, step-by-step. As a first step, you Chain 10 as the pattern says to begin.
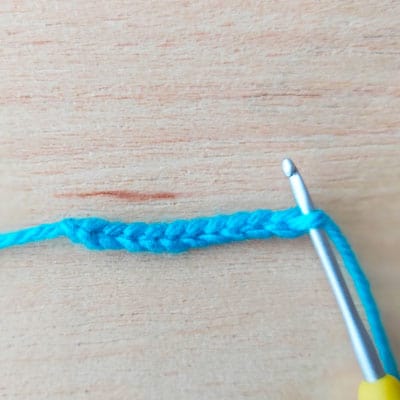
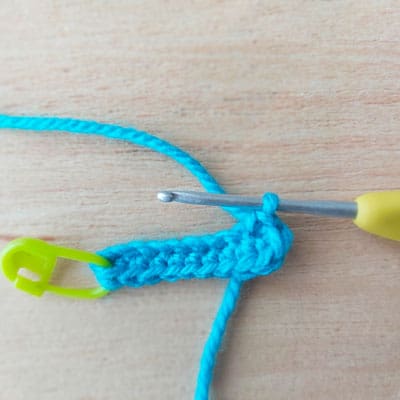
Starting from the second chain from the hook (so you skip the chain right below your hook), SC in each of the next 8 chain. Remember to insert your stitch marker into the first SC to mark the start of your round.
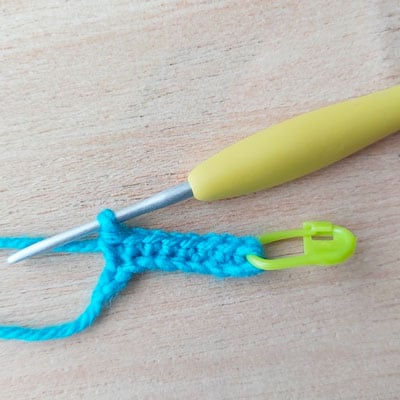
Now crochet 3 SC in the last chain. As you do this, your work will turn and you will end up on the other side of the chain.
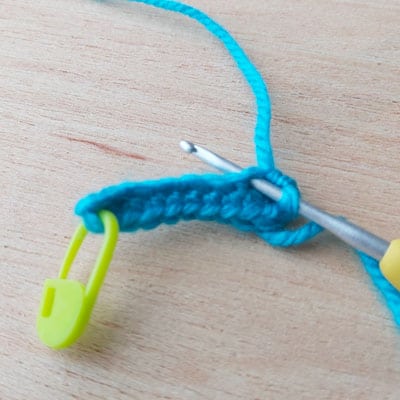
Now we will SC in each of the back loops of the next 7 chains. In the first photo below, you can see how to insert your hook into the back loops.
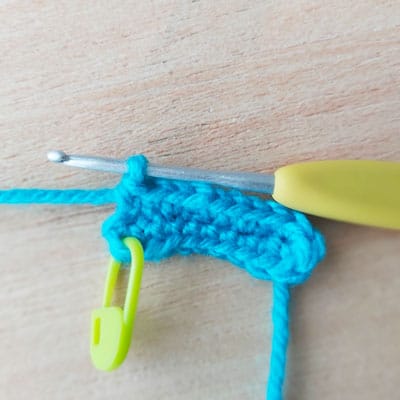
Finally, you crochet 2 SC in the back loop of the last chain.
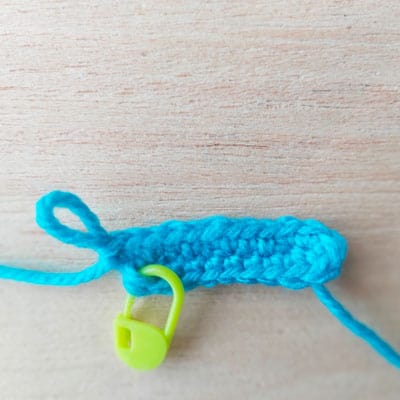
There you go – you’ve completed the first round. Yay! Now you can continue the pattern as instructed.
Note: If you end up with holes as you crochet around the chain, try going down a hook size to make the chain and then continuing with your regular hook size.
How do you Design a Crochet Oval Shape?
So, if you’re anything like me, you may be wondering why ovals are crocheted this way. (I was totally that kid who would annoy the grown up around me to ask “but why??” after everything!) If you’re not curious, feel free to move on. But if you’re curious or are a designer wondering how to crochet ovals, read on!
Before I learnt this, I really could not understand why or how designers decided to insert increases where they did. But, my friends, there is method to the madness after all! Once you understand this, you can crochet ovals in all shapes and sizes.
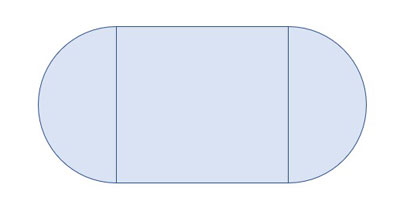
The way I think about crocheting ovals is the shape of a bandaid – a rectangle with semi-circles on opposite sides like in the diagram above. The first chain and last chain that you work in make the semi-circle and the chains in the middle make up your rectangle.
The longer your starting chain is, the longer the rectangle is, so the more rectangular your oval is. The shorter your starting chain is, the rounder your oval is. (The minimum chain length for an oval is 4 – if you have a chain of 3, then there is no rectangular part and you essentially end up with a circle.)
Now let’s look at the diagram again to see how this works:
As you can see, you end up with 3 SC in both the first chain and last chain (excluding the skipped chain). (The first chain has one SC on the top side and 2 SC on the bottom side, for a total of 3 SC – just like the last chain has). So each of these is the start of a semi-circle. (In amigurumi, we typically begin with 6 SC in a magic circle – so each semi-circle has half of that).
Round 2
The next round in the pattern is:
Round 2: INC, 7 SC, (INC) in each of the next three stitches, 7 SC, (INC) in each of the next two stitches (26)
If you ignore the 7 SC on each side of your oval (these are for the rectangle part of your oval and will be constant in each round), you essentially have an increase in each of the stitches of your two semi circles – just like we usually do in the second round when we’re crocheting a circle (we typically increase in each of the stitches in the second round).
Round 3
Now look at the next round:
Round 3: SC, INC, 7 SC, (SC, INC) three times, 7 SC, (SC, INC) twice (32)
Again, your 7 SC on each side are constant and you’re doing (SC, INC) around your semi-circles – just like you would if you were making circle!
Crochet Oval Formula
So, to crochet an oval, your pattern will look like this:
Round 1: Chain n+3. SC, nSC, 3 SC in the next chain as your work turns. Now continue on the other side of the chain. nSC, INC
Round 2: INC, nSC, (INC) in each of the next three stitches, nSC, (INC) in each of the next two stitches
Round 3: SC, INC, nSC, (SC, INC) three times, nSC, (SC, INC) twice
etc.
Where n is the number of constant chains that you will do.
Later in this tutorial, we will talk more on how your shape will change as you increase or decrease your chains. We will also discuss how you can vary the oval pattern slightly.
Can you begin a Crochet Oval with a Magic Circle Instead of a Chain?
People often ask if they can use a magic circle when the pattern calls for a chain to make an oval. The answer, unfortunately, is no – because a magic circle will give you a round shape, rather than an oval which is what the pattern is calling for and so you won’t end up with the same result.
Crochet Oval Shape Variations: How do You Crochet a Fat or Thin Oval?
How you vary the size and shape of an oval is determined by a number of ways.
Variations in the Number of Starting Chains
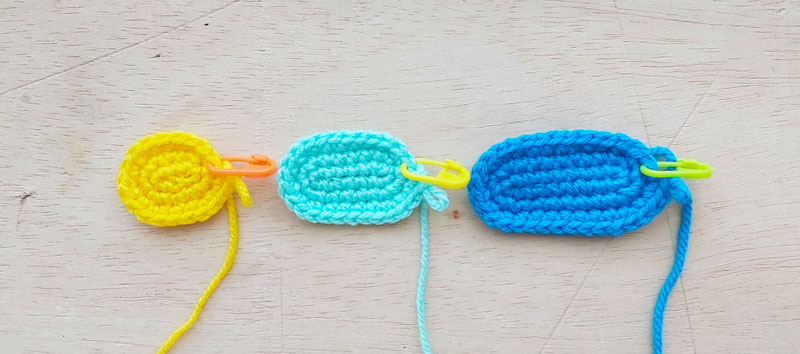
When ovals vary in the length of the foundation chain, the shape of your ovals will vary too. You can see this in the above photo three different ovals, where each began with a different number of foundation chains. The yellow oval starts with Chain 4, the light blue with Chain 7, and the darker blue with Chain 10.
So if you want a long and thin oval, you will increase your number of starting chains. If you prefer to have a more rounded oval, you will decrease your number of starting chains.
How Else Do Oval Shapes Vary?
Ovals can also vary in the number of SC that we put in the first and last stitches. In the above example, we had 3 SC on both ends of the chain. However, sometimes the pattern will be a little different with, for example, 4 SC in the first and last chain. So, for example, it could be:
Round 1: Ch 10. Starting in the second chain from the hook, INC, 7 SC, 4 SC in the next chain as your work turns. Now continue on the other side of the chain. 7 SC and INC in the last chain (22)
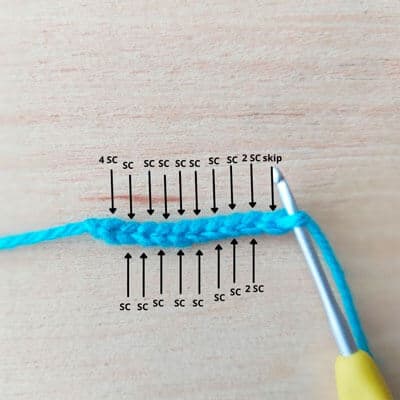
The principle there is the same as when it’s 3 SC in the first and last chain, but it’s just that the semi-circles are like a circle that begins with 8 SC into a magic circle. So in the next round you would still increase in each of the stitches that are worked into the first and last chain (excluding the skipped chain) and so on.
What are Some Examples of Ovals in Amigurumi
Ovals are used a lot in amigurumi. Here are some examples of how they are used:
- Animal Muzzles and Snouts: Oval muzzles give a nice elongated shape and so many of the animals in our Juna Series of amigurumi animals have muzzles that have an oval shape. For example, Ukie the Unicorn, Hattie the Hippo, and Cray the Crocodile all have muzzles that are based on an oval.
- Doll feet and shoes: We also often use ovals for the base of doll feet and shoes. For example, our the shoes for our Zayd doll are crocheted in an oval.
- Animal belly patches: Sometimes we use ovals in belly patches like in Dewey the Dinosaur
- Eyes: For some amigurumi, you may want to have oval eyes. We have used this for the eyes for our little Morphle doll.
Crochet Oval Tutorial – Final Thoughts
So that concludes our primer on everything you need to know about crocheting ovals! Understanding this was a big Eureka moment for me – and honestly was essential in helping me design my own amigurumi patterns. I hope it is helpful for you too. This primer has been in my head for a while so please let us know if you have any feedback (sometimes the thoughts in my head don’t translate so well on paper! lol).
Happy Crocheting!