Attention all musicians – this crochet guitar is a must-have for the musician in your life. It’s been a while from design to sharing but we are finally ready to share our crochet guitar pattern with you! So I come from a family of musicians but the music gene skipped me! Lol. So while I can’t make music, I thought it would be fun to crochet a guitar as a gift for all the awesome musicians in my life.
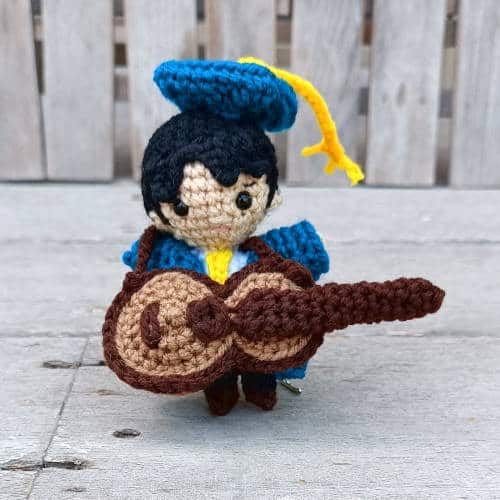
This pattern was actually initially designed last May for Kozu’s elementary school graduation. He was going to be playing the guitar during the graduation so I stayed up all night and crocheted (and designed!) a graduation doll for him with a matching guitar and so this guitar pattern was born!
The first draft was great but I wanted to add tuning keys. I tried a few different ways but I wasn’t happy with the results. Finally, I settled on French knots (which I had to teach myself to do!) and I love it!
We hope you love this crochet guitar pattern as much as we do!
About this Crochet Guitar Pattern
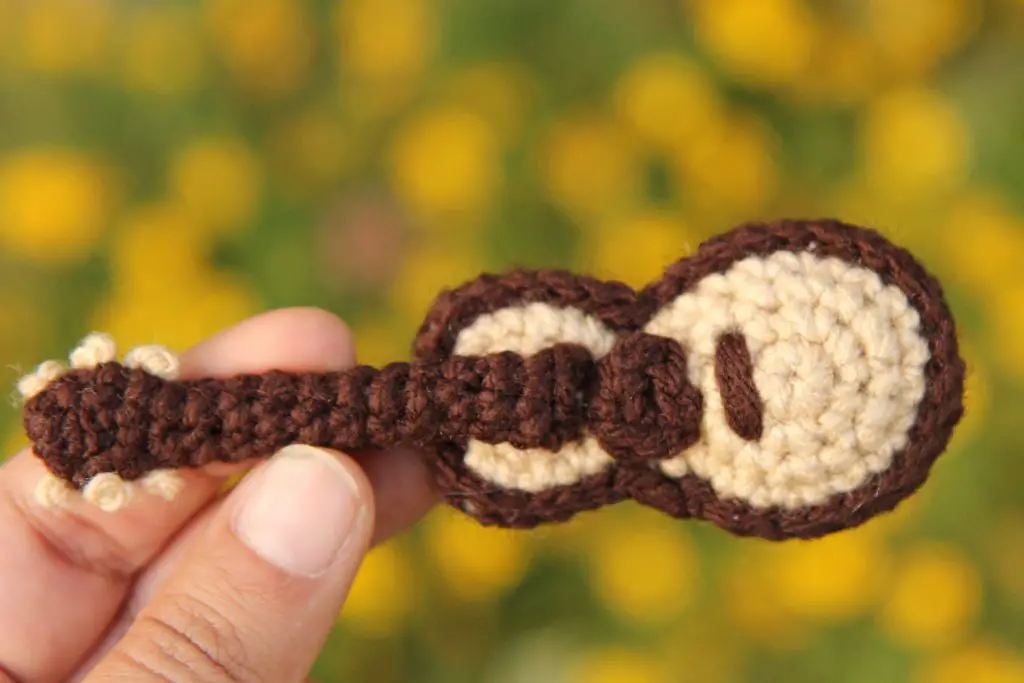
This crochet guitar pattern is approximately 4.5 inches long using DK yarn and a 2.75mm crochet hook. The body is crocheted in two parts, which are then sewed together. The front and back of the body are then crocheted together. The body is lightly stuffed to give it some thickness and depth.
The neck of the guitar has three tuning keys on it. The tuning keys are all made using French knots. If you haven’t done French knots before, don’t worry. I hadn’t until I designed this pattern and taught myself how! And so I have made a quick photo tutorial for you to follow to add French knots to your guitar. If you want the neck to be firm, you can cut a wooden skewer the length of the neck to give it some support. But that part is completely optional!
This pattern is an intermediate pattern, since crocheting the two parts together may be difficult for beginners. However, I think an adventurous beginner could definitely give it a try, as we do have photographs to show you how to do the different parts of the guitar.
This guitar is also a great accessory for our Kozu Palm Pals crochet dolls, which is a completely customisable series of doll patterns so you could make it with a matching mini-me doll for the musician in your life. It would also make for a great crochet keychain or luggage tag!
Want to save this pattern for later? Save it to your Pinterest Board.
Small Crochet Acoustic Guitar Free Pattern
This pattern is for your personal use only and cannot be sold, copied, or reproduced in any way without permission from the designers. You may sell finished objects made from this pattern in small quantities but please give credit to chaicoffeecrochet.com as the pattern designer.
Tools & Supplies You Need to Crochet a Guitar
- Yarn: You need a very small amount of yarn in beige and brown
- 2.75 mm crochet hook
- Tapestry needle
- Stitch markers
- Polyfill stuffing
- Thin wooden skewer or lollipop stick (optional)
Crochet Guitar: Stitches Used & Abbreviations
This pattern is written in US terms and crocheted in continuous rounds unless specified otherwise.
Sl st: slip stitch
SC: single crochet
INV DEC: invisible decrease
INC: two SC in the same stitch
Pattern notes & Tips for Your Crochet Guitar
- Difficulty level: Intermediate
- This pattern is written in US terms.
- This guitar is crocheted in continuous rounds unless specified otherwise. Use a stitch marker on the first stitch of every round so that you don’t lose track of the start of your round.
- This guitar was made using DK yarn. However, you may use any yarn with the relevant hook. Usually, for amigurumi you go down 2-3 sizes from that recommended on the yarn label.
- To make the tuning keys on this guitar, we will be making French knots. We have a tutorial on how this is done at the end of the pattern.
Guitar Finished size
This guitar is approximately 4.5 inches long, if crocheted with DK yarn and a 2.75 mm crochet hook.
How to Crochet a Small Guitar
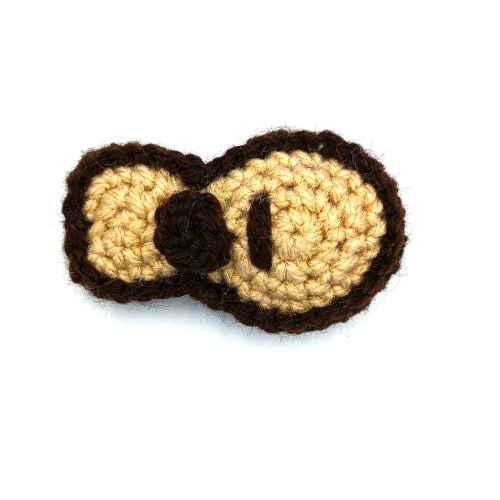
Guitar Body (Make 2)
Make one using beige, and one with brown
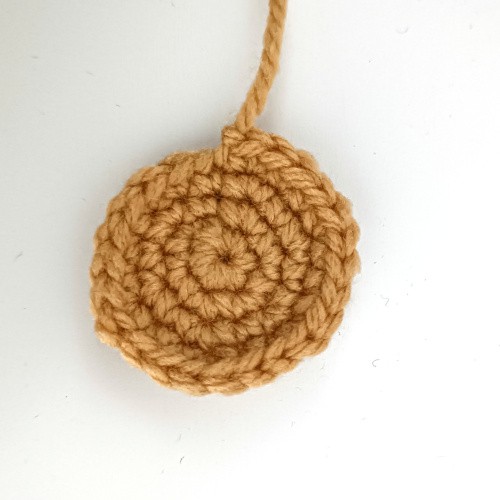
Part 1
Round 1: 4 SC into a magic circle (4)
Round 2: 3 SC in each stitch (12)
Round 3: SC, 3 SC in the next stitch, (2 SC, 3 SC in the next stitch) three times, SC (20)
Sl st to the first stitch in the round and fasten off.
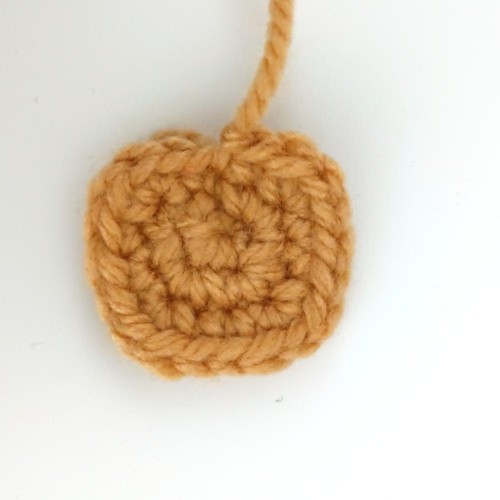
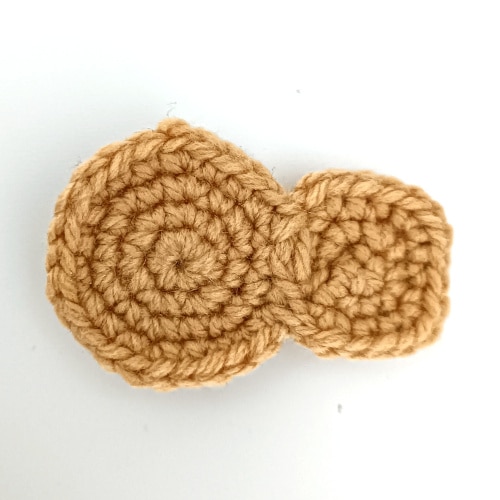
Part 2
Round 1: 6 SC into a magic circle (6)
Round 2: INC in each stitch around (12)
Round 3: (SC, INC) six times (18)
Round 4: (2 SC, INC) six times (24)
Sl st to the first stitch in the round and fasten off. Leave a long tail for sewing. Sew the two parts together.
Assembly
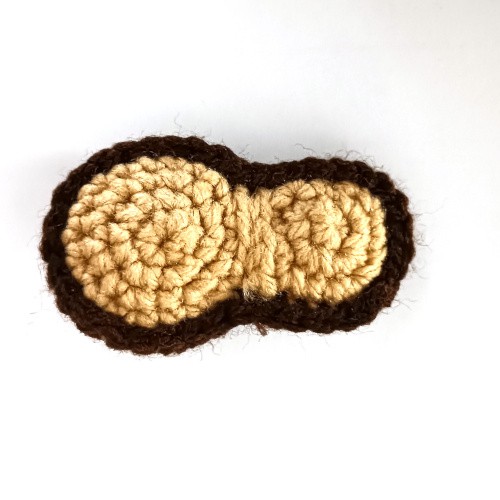
Using brown yarn
Put both parts together, back-to-back. Using brown yarn, insert your hook through the beige side first and then through the brown side.
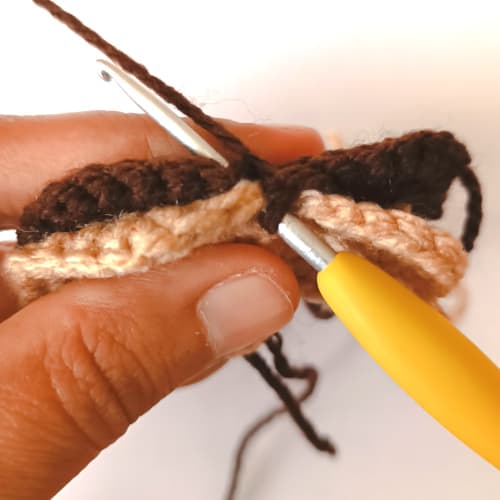
SC around to join the front and back sides together. Stuff the guitar body as you go. Sl st to the first SC and fasten off. Weave in the ends.
Sound Hole
Using brown
Round 1: 6 SC into a magic circle. Sl st to the first SC of the round. (6)
Fasten off and leave a long tail for sewing. Sew the sound hole onto the guitar between the first and second part of the guitar body. Use the leftover yarn to embroider on the bridge one round below the sound hole.
Guitar Neck
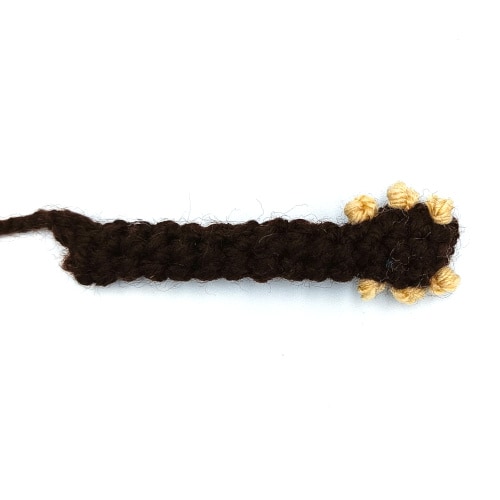
Using brown
Do not stuff
Round 1: 6 SC into a magic circle (6)
Round 2-4 (3 rounds): SC around (6)
Round 5: 4 SC, INV DEC (5)
Round 6-15 (10 rounds): SC around (5)
Fasten off and leave a long tail for sewing. Use beige yarn to add three French knots on either side of the top of the guitar neck to make the tuning keys.
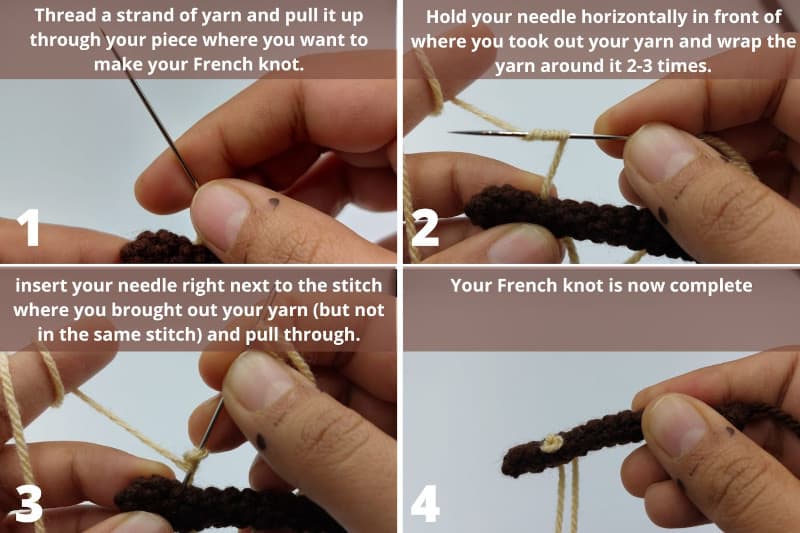
How to Embroider a French Knot
If you would like to make the guitar neck more stiff, cut a thin wooden skewer to just shorter than the length of the neck and insert it inside.
Sew the guitar neck closed and sew it onto your guitar, just above the sound hole.
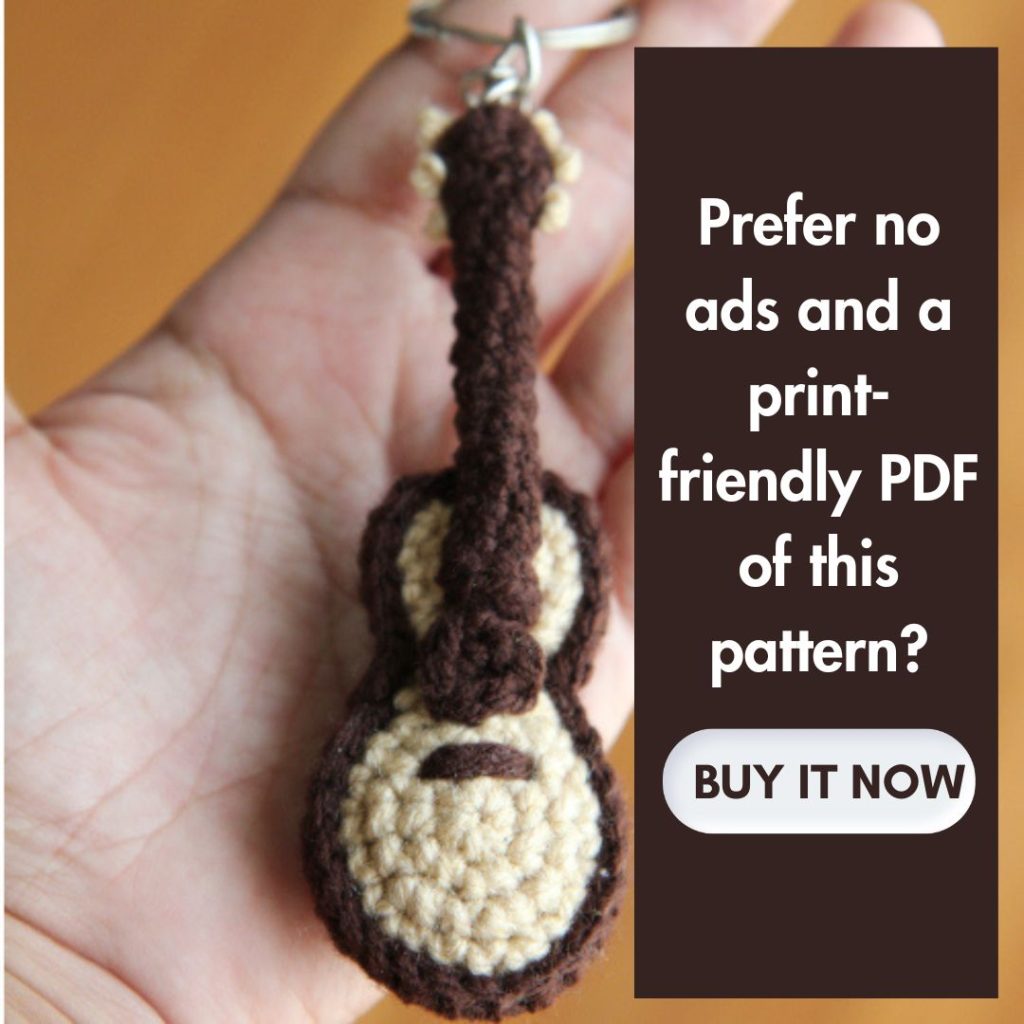
If you want to attach a keychain, attach it now.
Your crochet guitar is now ready!

How do you make a crochet guitar keychain?
If you would like to make this into a keychain, use a keychain ring with a jump ring. Use pliers to pull apart the jump ring. Hook it into the centre of the magic circle at the top of the guitar neck and use pliers to close the jump ring tight.
How do I crochet a guitar strap for this guitar?
If you would like to add a guitar strap to your guitar (it would make a great accessory for our Kozu Palm Pals crochet dolls!), just attach yarn to the top of your guitar and chain the length that you would like. Slip stitch into the top of your guitar on the other side and fasten off.
How long does it take to crochet a guitar?
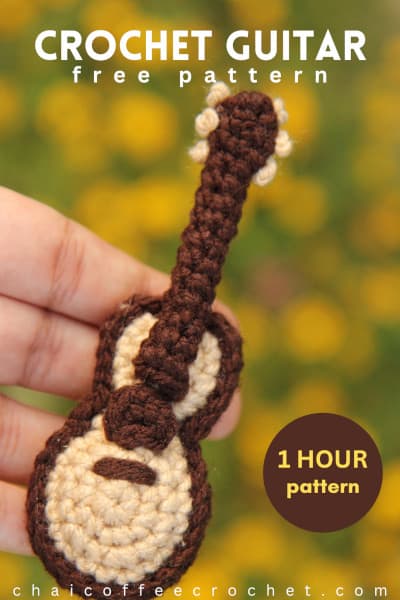
The exact time it will take you to crochet this guitar will vary based on your speed. However, according to our awesome pattern testers it took them from 30 minutes to one and a half hours so, either way, it’s super quick!
Is it easy to crochet this guitar?
This guitar can be a little tricky for beginners, just in terms of understanding how to crochet the two pieces of the guitar together. However, it is explained step-by-step with photographs so adventurous beginners can definitely try it! The French knots may be unfamiliar but we have tried to explain how to make them, with a step-by-step photo tutorial.