
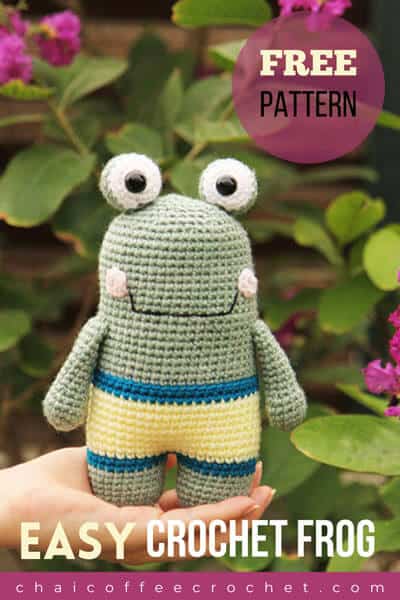
Learn How to Crochet an Easy Amigurumi Frog
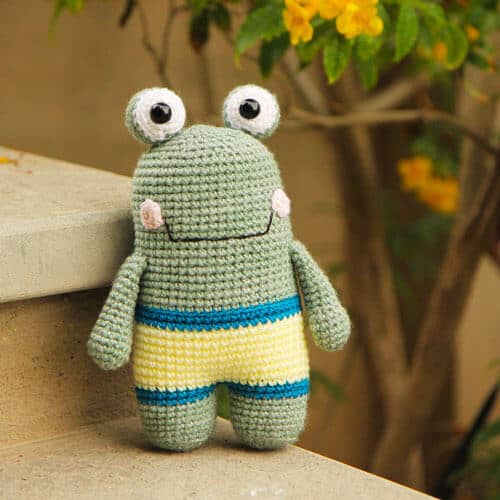
Flippy the Frog, made from our easy crochet frog pattern , is ready to jump into your heart! It has many months since we added a free pattern to our Juna Series of crochet animals and we’ve been thinking about what animal to crochet next. We asked many of you on social media and realized that an amigurumi frog would be just the thing to add!
If crochet were to have a mascot, it would definitely be a frog! (For any beginners out there who are unfamiliar, the term “frogging” in crochet means to open up your project because you just “rip it, rip it” lol!) So a crochet frog is just the thing we needed to add to our collection.
We actually crocheted our first prototype of Flippy a few months ago, when a client asked us to crochet a frog toy for her child. She wanted a frog plushie without any clothes so he was a little different from what Flippy is today but we were definitely smitten! Then, of course, life happened in the middle (don’t you hate it when life gets in the middle of your crochet?) and so it took a while. But we love the result – those eyes!
And do you know the best part? Flippy is the easiest amigurumi animal pattern in our collection so far.
About this Crochet Frog Pattern
This crochet frog pattern works up to be approximately 8 inches tall. It is an easy amigurumi pattern for beginners (but at the same time so cute that crocheters of all skill levels will want to make him!). The steps are simple but it also allows you to practice things like colour changes, crocheting in the back loops, and increases and decreases. So if you’re looking for an amigurumi pattern for absolute beginners, Flippy the crochet frog is a great pattern to begin with!
The legs, body and head of this easy crochet frog are all worked in one piece. We even have a tutorial on how to crochet in the arms to the body- so you just have to sew on the eyes, making it almost a no sew amigurumi.
Our frog pattern comes with cute little swim shorts but, if you’re feeling adventurous, you can switch the outfit with any of the other animals in the series by keeping the body colour the same but using the other animal pattern for until you crochet in the arms, and then switching to the pattern for the frog.
If you would like an ads-free, print-friendly PDF version of our pattern, you can buy it from our Ravelry store.
Want to save this pattern for later? Save this pin to your Pinterest board.
You can also pair this pattern, with our cute frog crochet baby rattle for a truly adorable and unique gift for a baby!

Easy Crochet Frog Free Pattern
This pattern is for your personal use only and cannot be sold, copied, or reproduced without the designers’ permission. You may sell finished objects made from this pattern in small quantities but please give credit to chaicoffeecrochet.com as the pattern designer.
Tools & Materials That You Will Need To Crochet a Frog
- Yarn: Less than 100 grams of DK yarn in green and a small amount in two colours for the shorts, light pink, and white. (We use DK yarn but any yarn with the relevant hook will work.)
- 3mm crochet hook
- Tapestry needle
- Stitch marker
- Polyfill stuffing
- Two 12 mm safety eyes or you can crochet eyes for children under 3
- Embroidery thread in black for the smile
Simple Crochet Frog: Crochet Stitches and Abbreviations
This pattern is written in US terms and crocheted in a spiral unless stated otherwise.
Sl st: slip stitch
SC: single crochet
INVDEC: invisible decrease
INC: two SC in the same stitch
BLO: back loops only
Finished size: Approximately 8 inches tall.
How to Crochet an Easy Frog Amigurumi
Arms (make 2)
Use green
Round 1: 6 SC into a magic circle (6)
Round 2: INC in each stitch around (12)
Round 3: (5 SC, INC) twice (14)
Round 4-5 (2 rounds): SC around (14)
Round 6: (5 SC, INVDEC) twice (12)
Stuff the bottom of the arms lightly.
Round 7: (4 SC, INVDEC) twice (10)
Round 8-16 (9 rounds): SC around (10)
Tip: If you want to attach the arms to your frog while crocheting the body (it’s a really easy no-sew way!), see our tutorial on crocheting arms to your amigurumi to see how to finish off the arms.
If you prefer to sew the arms to your frog, fasten off and leave a long tail for sewing. Do not stuff the rest of the arm.
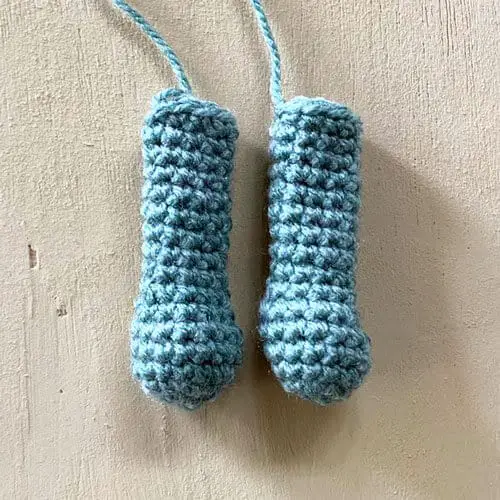
Legs (make 2)
Stuff legs lightly as you go.
Using green yarn
Round 1: 6 SC into a magic circle (6)
Round 2: INC in each stitch around (12)
Round 3: (SC, INC) six times (18)
Round 4: (2 SC, INC) six times (24)
Round 5: SC in BLO around (24)
Round 6-10 (5 rounds): SC around (24)
Change to shorts accent colour.
Round 11-12 (2 rounds): SC around (24)
Fasten off for the first leg. Leave a long tail for sewing to sew the hole between the legs when joining.
Repeat rounds 1-12 for the second leg but don’t fasten off.
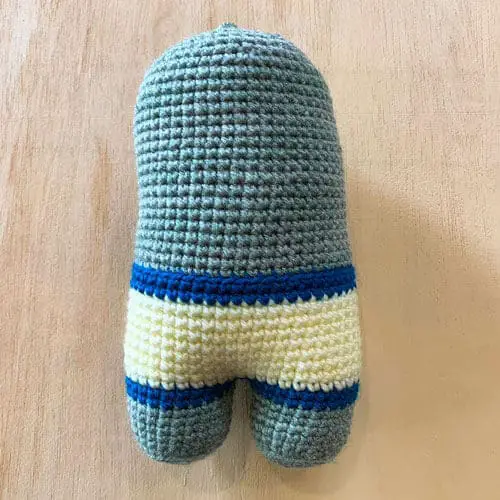
Body
Change to main shorts colour
Now we will join the legs. If this is your first time doing this, we have a tutorial on how to join the legs in Round 13.
Round 13: Sl st into the first unworked stitch of the first leg. SC in the remaining 23 stitches of the first leg and the 24 stitches of the second leg. (48)
Use the yarn tail from the first leg to sew closed any hole remaining between the legs.
Round 14-20 (7 rounds): SC around (48)
Change to shorts accent colour
Round 21-22 (2 rounds): SC around (48)
Change to green
Round 23-41 (19 rounds): SC around (48)*
*If you are crocheting on the arms for your frog, you will attach them in Round 28. See the tutorial on how to crochet on the arms for instructions. If you are planning on sewing on the arms, you will sew them on once we are done with the body.
Stuff the body.
Round 42: (6 SC, INVDEC) six times (42)
Round 43: (5 SC, INVDEC) six times (36)
Round 44: (4 SC, INVDEC) six times (30)
Round 45: (3 SC, INVDEC) six times (24)
Round 46: (2 SC, INVDEC) six times (18)
Round 47: (SC, INVDEC) six times (12)
Ensure that the body is stuffed firmly.
Round 48: INVDEC six times (6)
Fasten off. Insert needle in front loop of each stitch and pull tight to close. If you haven’t attached the arms to your frog yet, you sew them on between Rounds 28 and 29.
Eyes (make 2)
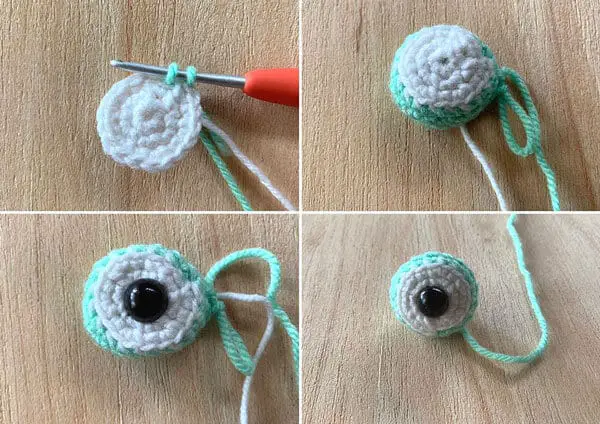
Begin with white
Round 1: 6 SC into a magic circle (6)
Round 2: INC in each stitch around (12)
Round 3: (SC, INC) six times (18)
Change to green
Round 4: SC in BLO around (18)
Round 5-7 (3 rounds): SC around (18)
Insert your safety eyes in the center of the magic circle and stuff the eyes.
Round 8: (SC, INVDEC) six times (12)
Round 9: INVDEC six times (6)
Fasten off. Insert needle in front loop of each stitch and pull tight to close.

Sew onto the head between Rounds 3 and 5 from the top, approximately 5 stitches apart.
Cheeks & Mouth
Use light pink yarn
Round 1: 6 SC into a magic circle. Sl st to the first stitch and fasten off (6)
Embroider on a smile between Rounds 18 and 19 from the top of your frog and sew the cheeks onto your frog at each end of the mouth.
Your Flippy the crochet frog is now complete! We hope you enjoyed this crochet frog free pattern! We would love to see your finished amigurumi frog, so share them on our Facebook group Amigurumi with Chai Coffee Crochet or tag us on Instagram @chaicoffeecrochet We like to share a selection of makes from our patterns in our stories and highlights.
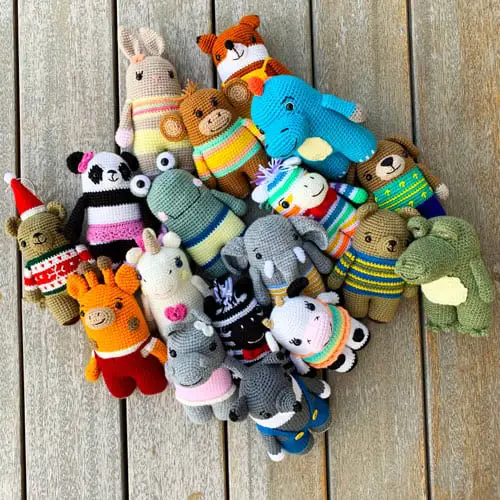
If you enjoyed this pattern, why not try some of the other amigurumi animals in our Juna series?
What is frogging in crochet?
Frogging in crochet is probably the least favourite thing for any crocheter! It refers to when you have to open up your work because you’ve made a mistake. It’s called frogging because you have to rip it, rip it, rip it (get it? like ribbit like a frog!).
Is it easy to crochet a frog?
Yes, this frog is very easy to crochet and is the perfect pattern for beginners. In fact, I think it’s the easiest pattern from our Juna Series of easy crochet animals. The pattern is worked entirely in single crochet. It doesn’t even require much sewing; it’s a low-sew amigurumi pattern where you just sew on the cheeks and eyes. Easy peasy, right?
How long does it take to crochet a frog?
This frog is quite easy to crochet. You can crochet this frog in approximately five hours. You can get it done in a day, making it perfect for a last minute crochet gift.
Is this crochet frog amigurumi safe for babies?
If you would like to crochet this frog for a baby, be sure to crochet on the eyes, as safety eyes – despite their name – are not recommended for children under 3. If you’re crocheting this frog for a baby, be sure to pair it with our frog baby rattle, as they make an adorable duo.