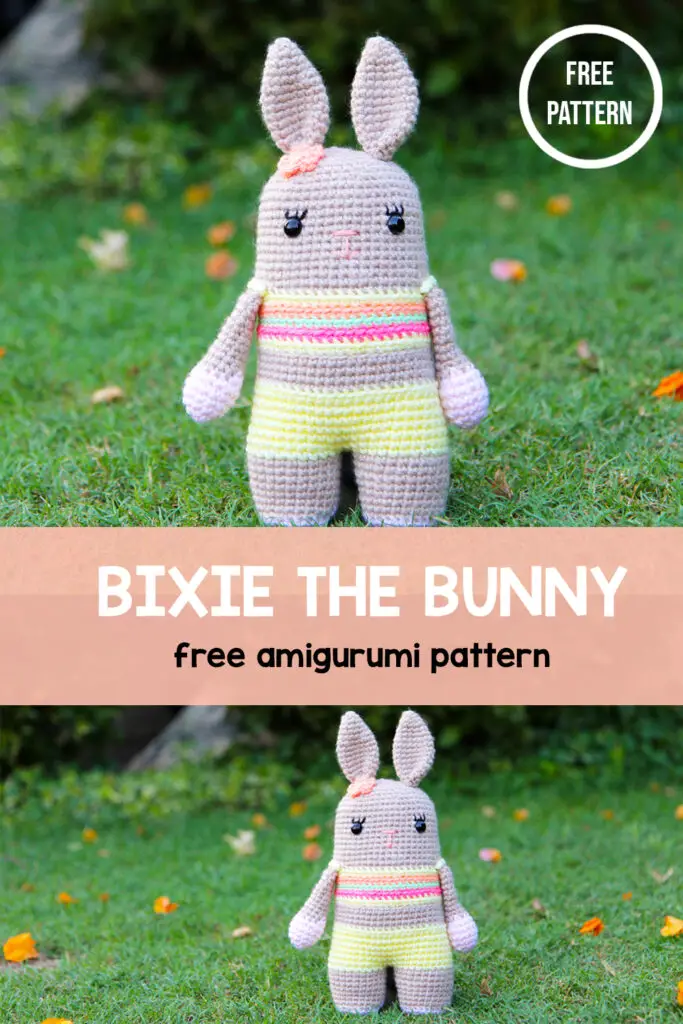
Easy Amigurumi Bunny Pattern
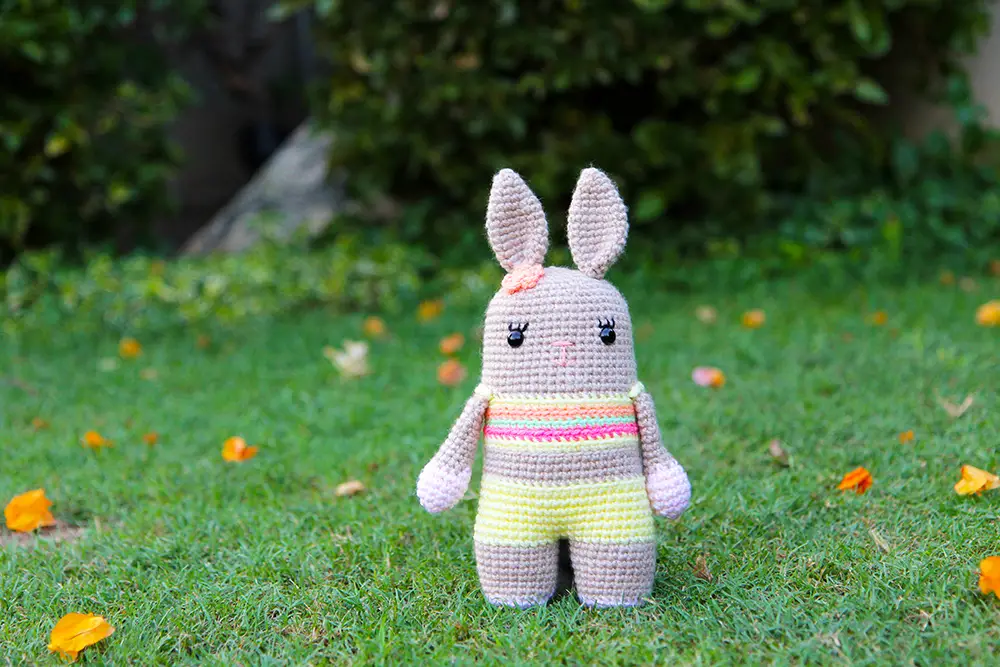
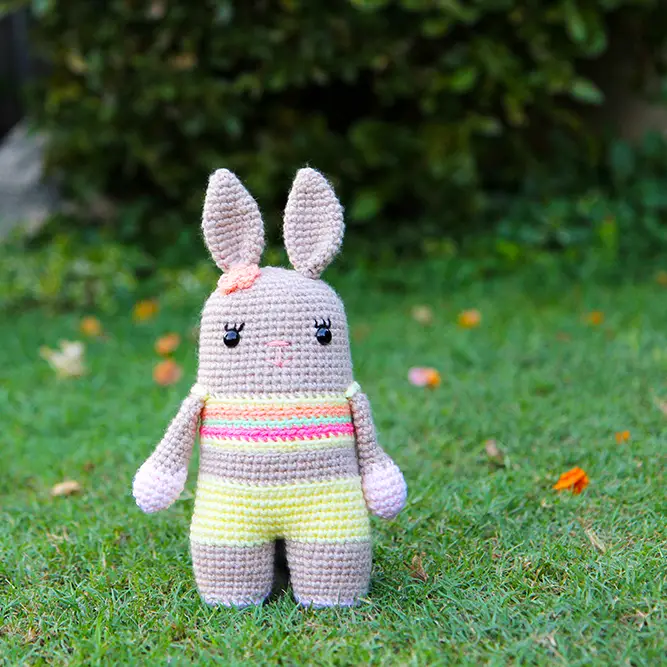
Bixie the crochet bunny is such a sweet addition to our Juna series of crochet animals. She is dressed ready for a day in the sun with her adorable outfit and pretty flower! This sweet little bunny is perfect for Easter, Spring, or any time of the year (who doesn’t love bunnies year round?).
Bixie is also on of the most beginner-friendly pattern in our series. While the entire series is suitable for beginners, this crochet bunny makes for a perfect starter project to learn amigurumi. It allows you to practice the basics, while still giving you a really great outcome in the end.
It’s one of my most favourite patterns to teach withIn fact, our aunt was visiting us and wanted to learn crochet so we used this pattern to teach her–and she did a great job! The pattern is easy and works up fast but is also TOO CUTE!
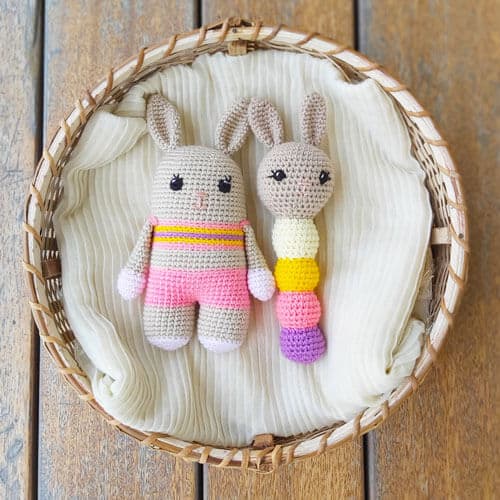
This crochet bunny also has a matching crochet bunny baby rattle that you can make for the cutest matching pair!
About this Crochet Bunny Pattern
Our Bixie the crochet bunny pattern is a very easy pattern for beginners. The legs, body, and arms are all crocheted into the body (no sewing – yay!). You just have to sew on the ears, straps, flower, and tail. However, to allow the pattern to be crocheted in one piece you must follow the steps in the order that they appear. You need to crochet the arms before you do the rest of the body so that they can be crocheted in as you are making the body.
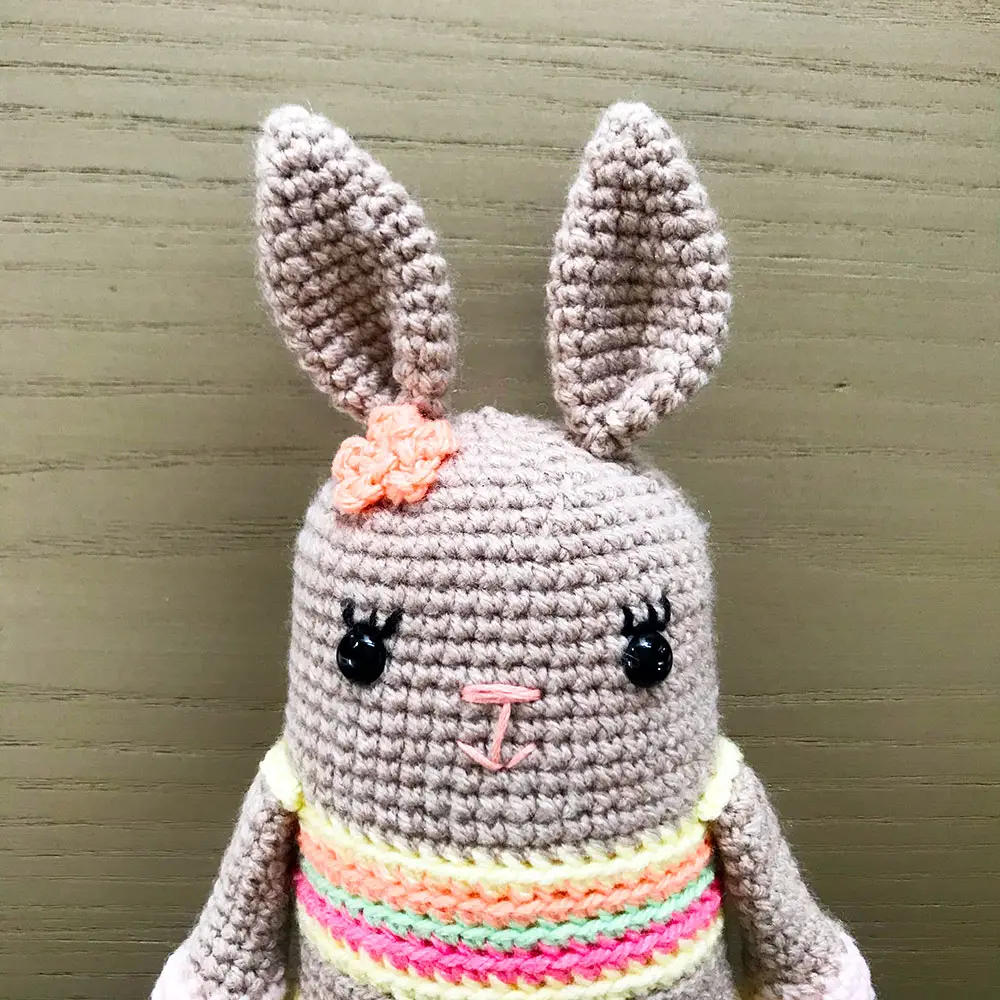
This pattern is really simple. Since the nose is simply embroidered onto your bunny, there is no muzzle or nose to be crocheted in separately. However, we have used a lot of colour changes and back loops only stitches to give the pattern colour and texture so that it is definitely no dull!
I love the flower on our sweet little rabbit’s head. It adds a really adds a pop of colour to the head and really gives these awesome Spring vibes!
The pattern is made using safety eyes. However, if you are making it for younger children, you have the option to crochet on the eyes to make them extra safe!
Want to save this pattern for later? Save it to your pinterest board.
If you would prefer a print-friendly, ads-free version, you can buy it on Ravelry for a small fee.
Easy Crochet Bunny Free Pattern
This pattern is for your personal use only and cannot be sold, copied, or reproduced without the designers’ permission. You may sell finished objects made from this pattern in small quantities but please give credit to chaicoffeecrochet.com as the pattern designer.
Stitches and Abbreviations Used
Sl st: Slip stitch
SC: single crochet
INV DEC: invisible decrease
INC: two SC in the same stitch
BLO: back loops only
Tools and Supplies You Will Need
- Yarn: You need approximately 50 grams of DK yarn in beige and a small amount light pink, light yellow, light peach, pink, and light green. I use DK yarn but you can use any yarn that you like.
- Crochet hook: For amigurumi, you typically go down one or two hook sizes from that recommended on your yarn label.
- Tapestry needle
- Stitch marker: You can use a locking stitch marker but even a scrap of yarn will do! This pattern is worked in the round, so place a stitch marker at the first stitch of each round so that you can keep track of where each row begins.
- Polyfill stuffing
- Safety eyes: Two 10 mm eyes or you can crochet eyes for children under 3
- Embroidery thread: A small amount of black for eyelashes and pink for the nose and mouth.
How to Crochet An Easy Bunny
Arms (make 2)
Begin with light pink yarn.
Round 1: SC 6 into a magic circle (6)
Round 2: INC in each stitch around (12)
Round 3: (5 SC, INC) twice (14)
Round 4-5 (2 rounds): SC around (14)
Round 6: (5 SC, INVDEC) twice (12)
Change to beige
Stuff the bottom of the arms lightly.
Round 7: (4 SC, INVDEC) twice (10)
Round 8-16 (9 rounds): SC around (10)
At this point, if you would like to crochet the arms in (which I highly recommend – the less sewing the better!), see our tutorial on how to crochet in arms and other parts on amigurumi to see how to finish off the arms. If you would prefer to sew them in, fasten off and leave a long tail for sewing.
Legs (make 2)
Stuff legs lightly as you go.
Begin with light pink yarn.
Round 1: SC 6 into a magic circle (6)
Round 2: INC in each stitch around (12)
Round 3: (SC, INC) six times (18)
Round 4: (2 SC, INC) six times (24) Change to beige.
Round 5: SC in BLO around (24)
Round 6-12 (7 rounds): SC around (24)
Fasten off for the first leg.
Repeat rounds 1-12 for the second leg but don’t fasten off.
Body
Change to yellow
We will be joining the legs in Round 13. If you’re unfamiliar with this, see our tutorial on how to join legs for amigurumi.
Round 13: Sl st into the first unworked stitch of the first leg. SC in the remaining 23 stitches of the first leg and the 24 stitches of the second leg. (48)
Round 14-19 (6 rounds): SC around (48) Change to beige.
Round 20: SC around BLO (48)
Round 21-23 (3 rounds): SC around (48)
Change to light yellow.
Round 24: SC around BLO (48) Change to pink.
Round 25: SC around BLO (48) Change to green.
Round 26: SC around BLO (48) Change to light peach.
Round 27: SC around BLO (48) Change to light yellow.
Round 28: SC around BLO (48) Change to beige.
*If you are crocheting on the arms for your alligator, you will crochet them in during Round 29. See the tutorial on how to crochet on the arms for instructions. If you are planning on sewing on the arms, you will sew them on once we are done with the body.
Round 29-41 (13 rounds): SC around (48)
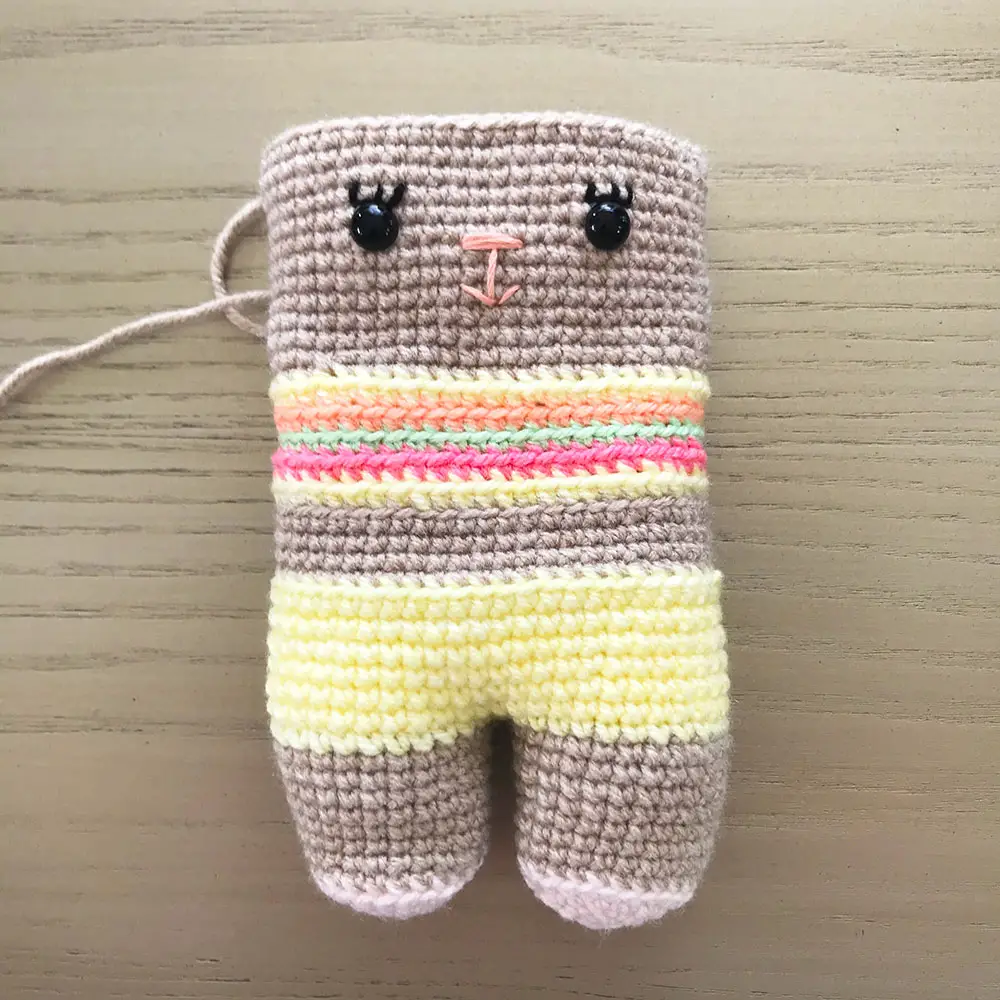
At this point, embroider the nose between rounds 35 and 36, 3 stitches across, then a line 3 stitches down, and a smile. Insert the eyes between rounds 36 and 37, approximately 10 stitches apart, centred to the nose. Once you are happy with the placement, remove the eyes and embroider on eyelashes, before reinserting the eyes and putting on the washer.
Stuff the body.
Round 42: (SC 6, INVDEC) six times (42)
Round 43: (SC 5, INVDEC) six times (36)
Round 44: (SC 4, INVDEC) six times (30)
Round 45: (SC 3, INVDEC) six times (24)
Round 46: (SC 2, INVDEC) six times (18)
Round 47: (SC, INVDEC) six times (12)
Ensure that the body is stuffed firmly.
Round 48: INVDEC six times (6)
Fasten off. Insert needle in front loop of each stitch and pull tight to close. If you haven’t crocheted them in, you can sew the arms onto the body between Round 29 and 30.
Ears (make 2)
Use beige yarn. Do not stuff.
Round 1: SC 6 into a magic circle (6)
Round 2: (SC, INC) three times (9)
Round 3: SC around (9)
Round 4: (2 SC, INC) three times (12)
Round 5: SC around (12)
Round 6: (3 SC, INC) three times (15)
Round 7-12 (6 rounds): SC around (15)
Round 13: (3 SC, DEC) three times (12)
Round 14: (2 SC, DEC) three times (9)
Fasten off and leave a long tail for sewing. Fold the ears flat and sew them closed. Sew the ears on at approximately 4 rounds from the top of the head.
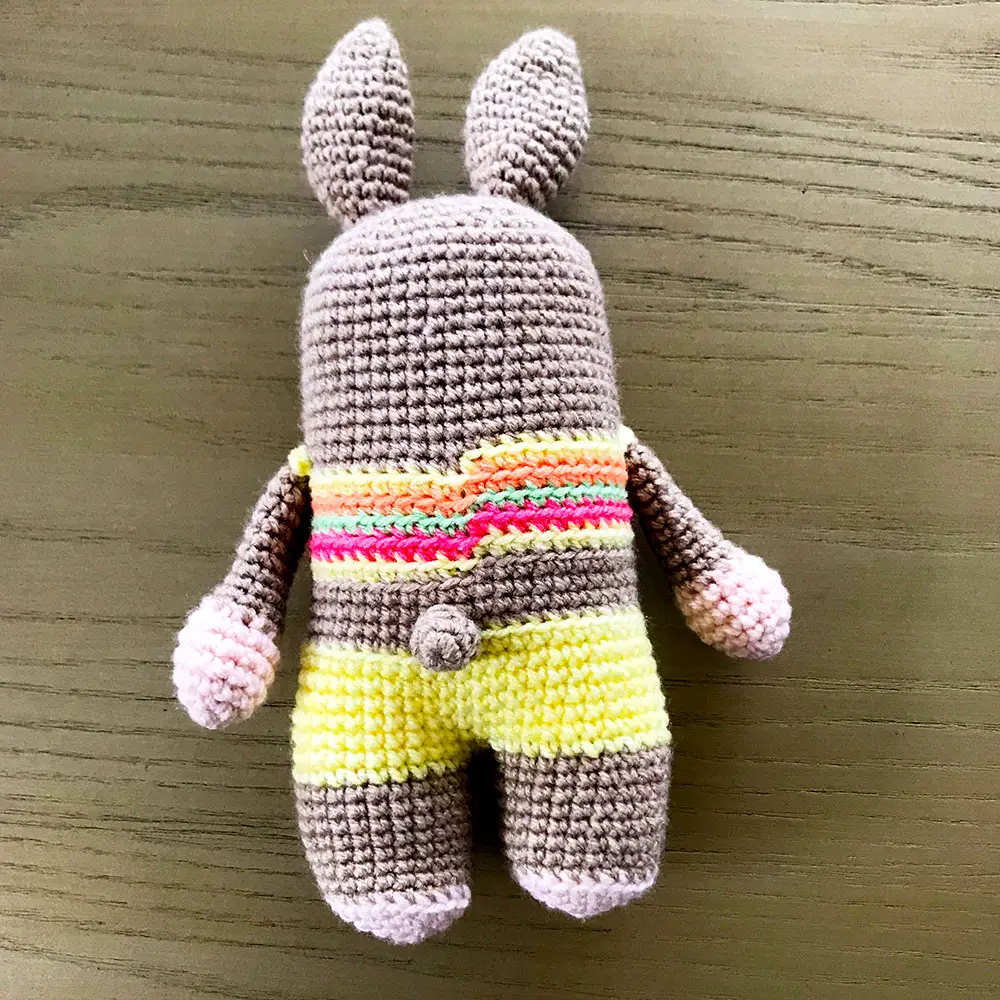
Tail
Use beige.
Round 1: SC 6 into a magic circle (6)
Round 2: (SC, INC) three times (9)
Round 3: (SC, DEC) three times (6)
Fasten off and leave a long tail for sewing. Sew the tail on above the shorts, at approximately Round 20.
Straps (make 2)
Using light yellow
Chain 6 and fasten off, leaving a long tail for sewing. Sew as straps on each side of the front of the shirt, around the arm and attached to the back.
Flower
Using light peach
Make a magic circle and (chain 4, sl st) 5 times. Fasten off. Sew on top of one of the ears.
Your Bixie is now complete! We hope you enjoyed this crochet bunny free pattern! We would love to see your finished bunny, so share them on our Facebook group Amigurumi with Chai Coffee Crochet or tag us on Instagram @chaicoffeecrochet We like to share a selection of makes from our patterns in our stories and highlights.
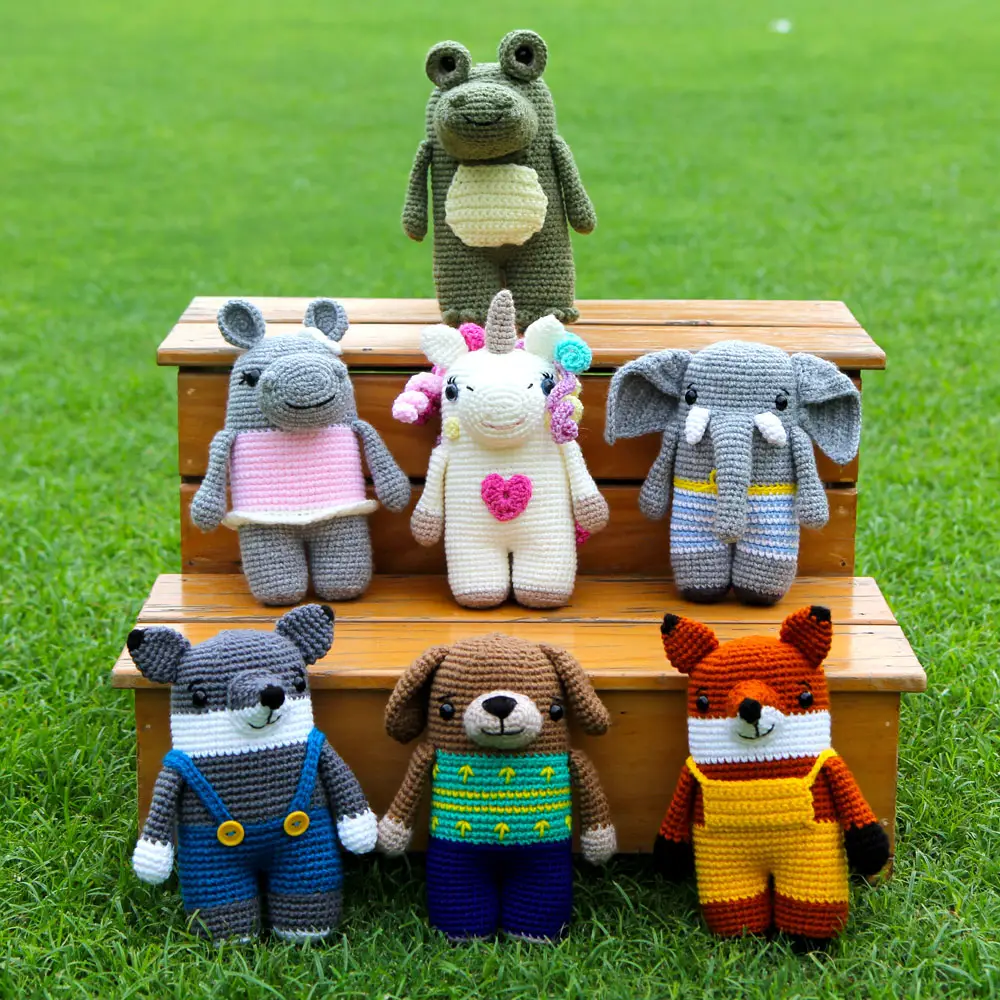
If you enjoyed this pattern, why not try some of the other animals in our Juna series?
How do you crochet a small bunny?
If you would prefer to crochet a small bunny, check out our small crochet bunny from our Kozu Palm Pets series. It’s a really sweet long eared bunny where the ears are crocheted in (so it’s actually completely no sew!). It is just 4 inches tall and so it works up super fast (in just a couple of hours!) and is perfect for a quick make.
What are other easy amigurumi animal patterns?
While all the animals in our Juna Series of easy crochet animals are very suitable for beginners, aside from our Bixie the Bunny pattern, our Flippy the crochet frog and Bax the crochet bear patterns are especially suited for beginners! But don’t be daunted by the rest – they are all very simple and we have really tried to break down all the instructions to make them all the more easy to follow.
Love these cute little Buddys!!!!
Thank you 😊