Hello friends! We are LOVING seeing your incredible designs. It’s just amazing to see the imaginative dolls that you and your creative kids have dreamt up!
And now we can get to the exciting part of crocheting them to life. This week, we will be making the bodies and clothes for our dolls.
If you’re joining us for the first time, be sure to visit the CAL homepage to learn more about the crochet along and here to get your worksheet!
Some Important Tips Before You Begin
Here are some important tips to read through before you begin:
- The patterns are a mix of built-in and removable outfits and are labelled as such. For the removable outfits, you will need to crochet the doll body before you begin the clothes. For the built-in outfits, you will follow the pattern from the start of the body to make your doll.
- Removable clothes will be put onto the doll from the legs up (rather than from over the head).
- If you (or your little designer) have gone a bit rogue with the clothes and have added details that are not in the worksheet, you can always check the rest of our Kozu Palm Pals dolls to see if you can find an appropriate pattern to use for rogue elements. Lol.
- Once you find the patterns for all the different elements in your design, plan out your doll. Plan out where you want the colour changes. This will help eliminate some of that dreaded frogging!
- If you’ve added dots on the outfits, try using french knots to make the dots (see our French knot tutorial).
- If there’s a mix of colour that is hard to replicate in the doll, try using variegated yarn.
- If you’re a beginner:
- the arms of the doll can be a little fiddly since it’s just 4 stitches around for each round! This video and tutorial by Planet June makes it a little bit easier.If you’re still having trouble crocheting the arms, try going down a hook side and then increase the number of rounds in the arms to 5 or 6. This way, it’s not as narrow but will still look great!
- We have a tutorial on how to join legs for crochet dolls if this is the first time you will be making a doll.
- Remember, you don’t need to get it perfect! For it to look like the designed doll, of course you want the elements to be the same. But if the colours changes aren’t in exactly the right places, it will still look great! So be gentle with yourself.
Now let’s begin with the patterns!
Clothing Patterns
NOTE: There are two types of outfits: removable and those that are built into the doll. For those that are removable, you first need to crochet the doll body and then the clothes. For the built-in ones, you need to crochet the body of your doll as you go. Each outfit is labelled as removable or built-in. Click on the links below to find the patterns for each of the parts (labelled by number).
Mix & Match Outfits

1. Crop Tank Top (removable)
2. Sleeveless Blouse (removable)
3. Tshirt (removable)
4. Skirt (removable)
5. Shorts (removable)
6. Pants (removable)
Complete Outfits
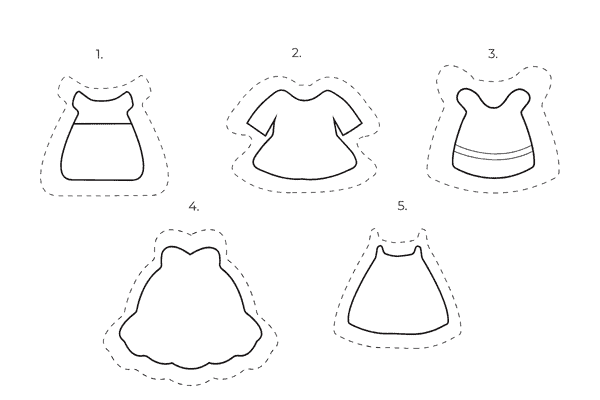
1. Two-Tone Dress (removable)
2. Dress with Long Sleeves (built-in)
3. T-shirt Dress (removable)
4. Gown with Sweetheart Neckline (built-in)
5. Sundress (removable)
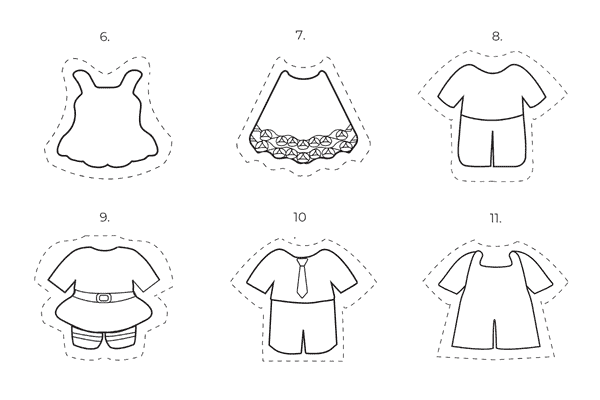
6. Ballerina Dress (built-in)
7. Lacy Dress (built-in)
8. Pant and Shirt (built-in)
9. Belted Outfit (built-in): For this we have two options – the first is a belted outfit with a skirt and the other is a belted outfit with a long shirt. Check out both and see which you prefer for your design.
10. Pant and Shirt with Tie (built-in)
11. Overalls (built-in)
Enjoy! As always, be sure to share your progress in our Facebook Community or by tagging us on Instagram with the hastag #chaicoffeecrochetcal We can’t wait to see how your dolls progress! See you next week when we will share the hair patterns with you!