
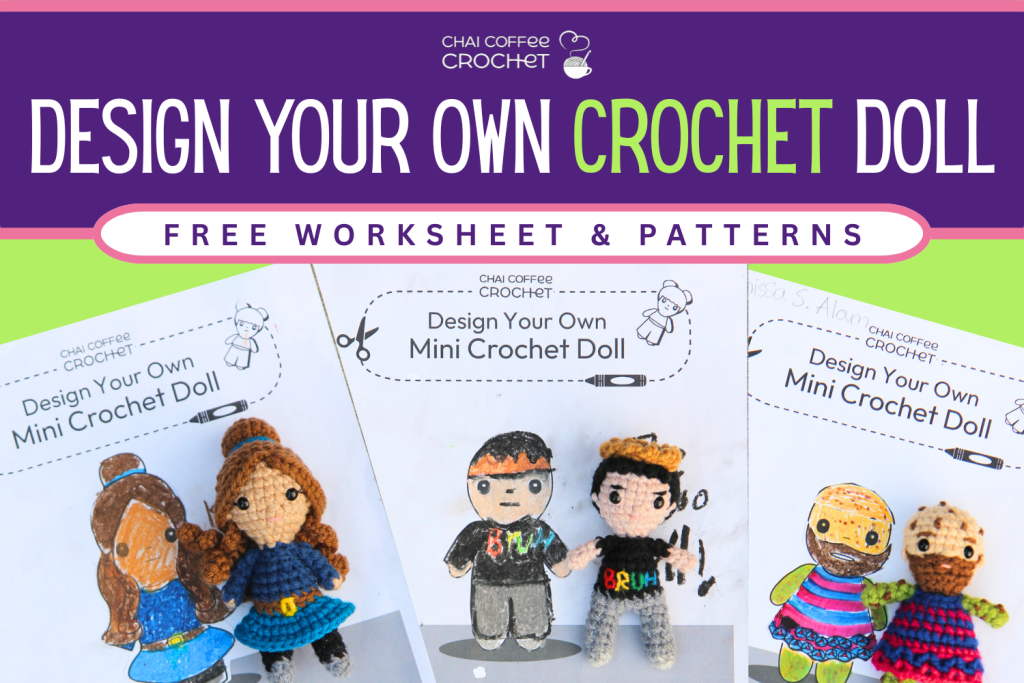
Ever wanted to design your own crochet doll? We have made it super easy for you to do so! This little idea has been brewing in our heads for ages (think: years!). And now it’s finally ready.
But here’s the twist: this pattern isn’t like any we’ve done before. Nope, not even close. There’s no new pattern. In fact, there isn’t even a single pattern. Instead… YOU are the designer!
Confused? Let me explain!
Want to save this for later? Pin the pin below to your Pinterest crochet board!
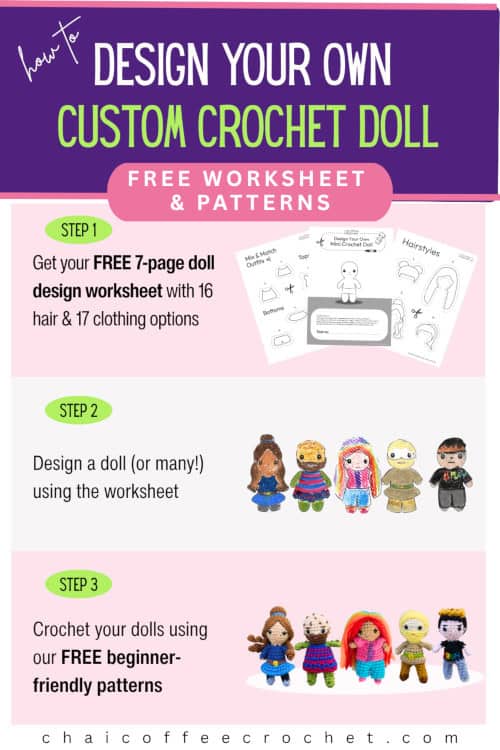
How it Works
We’ve created the cutest little Design Your Own Crochet Doll worksheet (throw back to those paper dolls we all used to cut out and dress up as kids!).
- The 7-page worksheet has a doll body (based on our Kozu Palm Pals series) and cutouts of 16 hairstyles and 17 clothing options. Plus, they can be mixed and matched for a much much larger variety! You can grab your worksheet here.
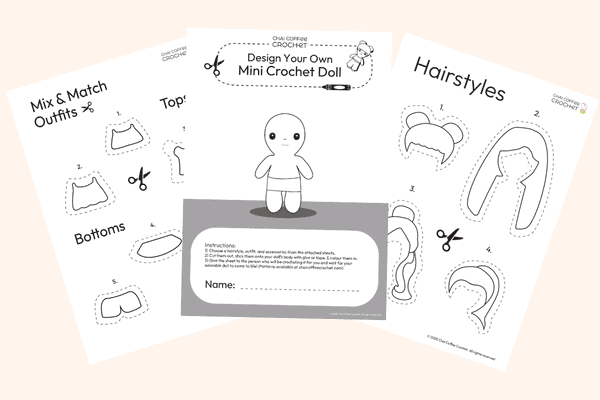
Your child (or the kid in YOU) can grab crayons, scissors, and glue and design their dream doll.
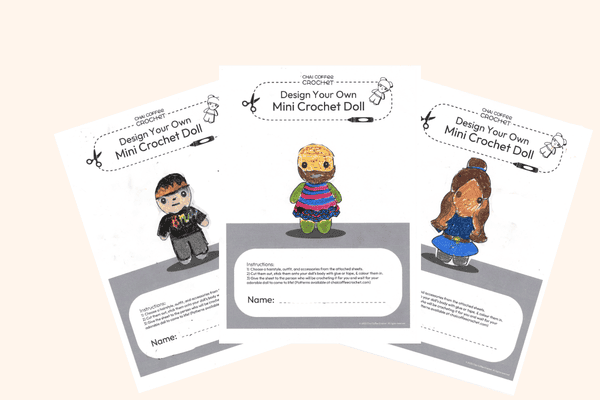
We have crochet patterns for each piece. And you’ll crochet that drawing to life with your yarn and hook.
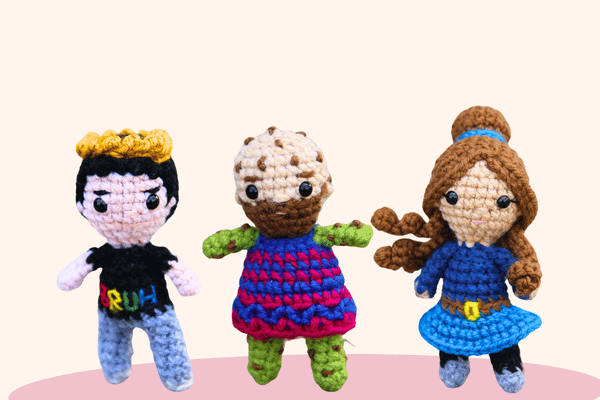
How ridiculously fun is that?! And get this, you don’t need to be an advanced crocheter for this. This pattern is beginner-friendly and super easy to do!
So get ready to crochet up a doll that’s as unique as the one who designs it. (If you like this idea, don’t forget to check out our Design Your Own Monster Pattern as well!)
We can’t wait to see what you dream up.
Materials You Will Need
- A Printer: You will need to print out the design template.
- Crayons, Markers, or Colour Pencils: Get your hands on some fun colours so that you’re ready to design your doll! (Keep in Mind: You will need yarn to match the colours that you use!)
- Scissors and Glue
- Yarn: You will need yarn on hand to crochet the doll. This is a great time to use scrap yarn! However, you won’t know the colours that you will need until you have finished designing your doll
Finished Size
- Your doll will be 4-4.5 inches using DK or worsted weight yarn. However, if you want a larger doll, try using plush yarn! With super bulky plush yarn, your doll can be 12 inch tall!
Step 1: Get Your Worksheet and Design Your Doll
First things first. Fill out your name and email address in the green box below so that you can get your worksheet.
Note: If you have any trouble getting the email, please check your spam folder or promotions tab (email can be so frustrating sometimes can’t it?). If you still can’t find the email, please email us at us@chaicoffeecrochet.com from the email address you signed up from and we will help you figure it out!
Tips for Designing Your Crochet Doll
Choose Colours Keeping your Yarn in Mind
Before you begin, consider the colours that you are using (or giving your kid to use). Remember the colours that you use should be colours that you have (or can buy) matching yarn for. If you want to use scrap yarn, restrict yourself (or your child) to colours that you have in your scrap yarn.
Also, since these are dolls, make sure you have options of colours that could be used for skin such as beige, peach, or brown.
Cut Out the Clothes and Hair Close to the Edges
The clothes and hair should be cut around the border of the outfit or hairstyle, not on the dotted line. The dotted lines are just to show you that they need to be cut but you should cut as close to the line as possible.
Because the cutting can be tricky, you may need to help children in cutting. You could also cut out the hair and clothing options before the designing begins to make the process easier.
Stick the Clothes onto the Doll and then the Hair
The worksheet is designed so that the clothes should first be added and then the hair. This is particularly true for the longer hairstyles, as the strands will be hidden behind the clothes and you won’t be able to see the hair properly.
Set Some Guidelines (Especially for Beginners!)
If you’re a beginner, you may want to set some guidelines for designing to make the crochet process easier. You can actually do this at any skill level. However, I don’t add any guidelines, as I enjoy a good challenge! Some guidelines for beginners could include:
- No vertical stripes. Vertical stripes are more challenging to crochet, as they require colour changes mid-row
- Stick to the cutouts – do not add anything additional. This enables you to have a pattern for everything, without having to improvise.
- There should be at least one pinky finger’s width of each colour in a stripe. This is because the doll is small and so there are not very many rounds. So colour changes are easier if done if they are wider.
- Mix & match only the outfits labelled “Mix & Match”. These outfits are removeable and they are easy to mix. Tops and bottoms are labelled separately. For those labelled “Complete Outfits,” it is easier to stick to the outfit in its entirety. These outfits are built into the doll (or are removable dresses) and so they are harder to mix and match.
Again, all of these are suggestions for beginners to make the process easier. However, if you’re up for a challenge, you can just let the design process be unstructured.
Keep Size in Mind When Choosing Your Yarn
The yarn weight will determine the size of your doll. This project was designed for a 4-4.5 inch doll, using DK or worsted weight yarn. However, you can use plush yarn for a larger doll! We’ve made these with super bulky blanket yarn and they turn out to be approximately 12 inches tall!
Let Kids Choose the Yarn for their Dolls
If you’re having children design their own dolls, it is also really fun to have them choose their own yarn as part of the process. This way, they can choose the colours that best match. It will not only give them ownership of the process, but will also let them get super excited while they wait for their doll to be completed!
Step 2: Crochet the Doll Body & Clothes
Here are some important tips to read through before you begin:
- The patterns are a mix of built-in and removable outfits and are labelled as such. For the removable outfits, you will need to crochet the doll body before you begin the clothes. For the built-in outfits, you will follow the pattern from the start of the body to make your doll.
- Removable clothes will be put onto the doll from the legs up (rather than from over the head).
- If you (or your little designer) have gone a bit rogue with the clothes and have added details that are not in the worksheet, you can always check the rest of our Kozu Palm Pals dolls to see if you can find an appropriate pattern to use for rogue elements. Lol.
- Once you find the patterns for all the different elements in your design, plan out your doll. Plan out where you want the colour changes. This will help eliminate some of that dreaded frogging!
- If you’ve added dots on the outfits, try using french knots to make the dots (see our French knot tutorial).
- If there’s a mix of colour that is hard to replicate in the doll, try using variegated yarn.
- If you’re a beginner:
- the arms of the doll can be a little fiddly since it’s just 4 stitches around for each round! This video and tutorial by Planet June makes it a little bit easier.If you’re still having trouble crocheting the arms, try going down a hook side and then increase the number of rounds in the arms to 5 or 6. This way, it’s not as narrow but will still look great!
- We have a tutorial on how to join legs for crochet dolls if this is the first time you will be making a doll.
- Remember, you don’t need to get it perfect! For it to look like the designed doll, of course you want the elements to be the same. But if the colours changes aren’t in exactly the right places, it will still look great! So be gentle with yourself.
Clothing Patterns
NOTE: There are two types of outfits: removable and those that are built into the doll. For those that are removable, you first need to crochet the doll body and then the clothes. For the built-in ones, you need to crochet the body of your doll as you go. Each outfit is labelled as removable or built-in. Click on the links below to find the patterns for each of the parts (labelled by number).
Mix & Match Outfits
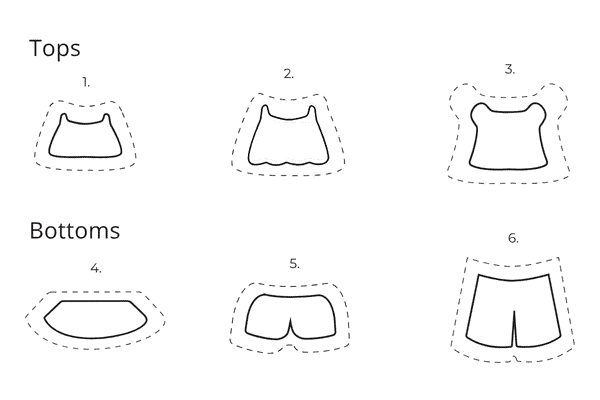
1. Crop Tank Top (removable)
2. Sleeveless Blouse (removable)
3. Tshirt (removable)
4. Skirt (removable)
5. Shorts (removable)
6. Pants (removable)
Complete Outfits
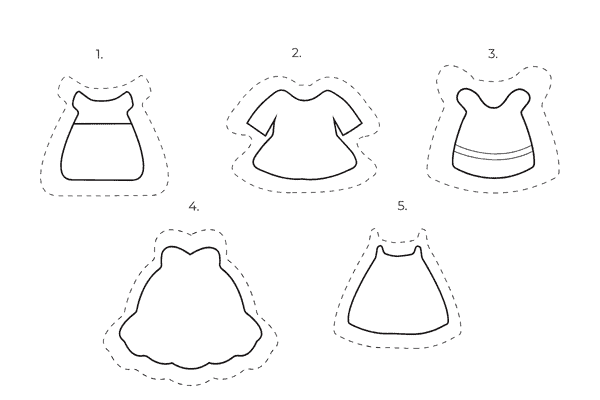
1. Two-Tone Dress (removable)
2. Dress with Long Sleeves (built-in)
3. T-shirt Dress (removable)
4. Gown with Sweetheart Neckline (built-in)
5. Sundress (removable)
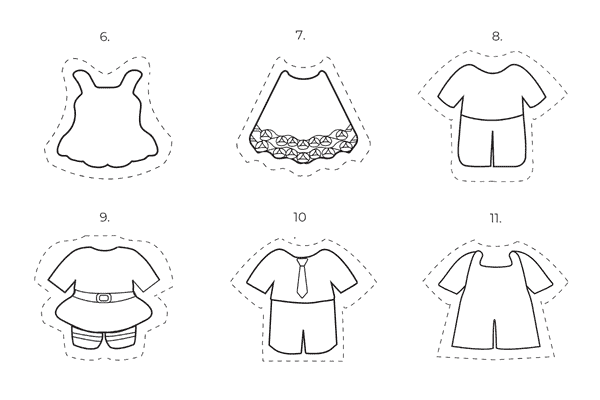
6. Ballerina Dress (built-in)
7. Lacy Dress (built-in)
8. Pant and Shirt (built-in)
9. Belted Outfit (built-in): For this we have two options – the first is a belted outfit with a skirt and the other is a belted outfit with a long shirt. Check out both and see which you prefer for your design.
10. Pant and Shirt with Tie (built-in)
11. Overalls (built-in)
Step 3: Crochet the Doll Hair
Hairstyle Patterns
Click on the links below to find the patterns for each of the hairstyles (labelled by number).
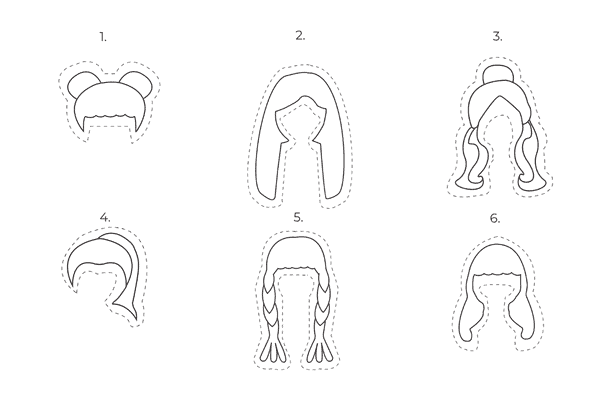
1. Space Buns
2. Long Hair: For this you can either do stranded long hair or you can make more realistic hair by giving your doll brushed yarn hair.
3. Semi Up-do
4. Ponytail: For the ponytail, you have two different options that you can use – a simple ponytail or a stranded ponytail.
6. Wavy Hair
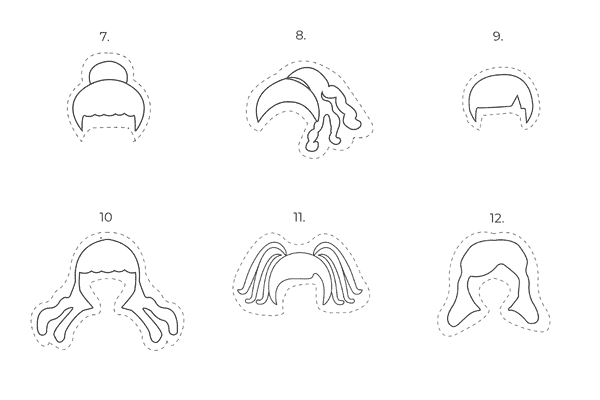
7. Hair Bun
9. Short Hair
10. Long Curly Hair
11. Pigtails
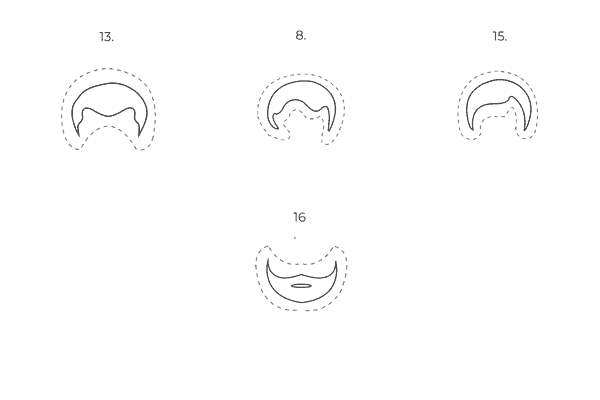
13. Widow’s Peak
We hope you enjoyed this free design your own doll pattern! We would love to see your unique crochet dolls, so share them them in our Facebook group Amigurumi with Chai Coffee Crochet or tag us on Instagram @chaicoffeecrochet Share your finished monsters with the hashtag #chaicoffeecrochet
